
In no particular order I strongly recommend you read and get knowledgeable on each of their offerings and register for a free subscription:
Now for each platform we will specifically implement 4 actions (commands):
- create a bucket/container (placeholder)
- copy object(s)
- delete objects(s)
- delete a bucket/container (placeholder)
We will be using the 2016 Jersey City – Citi Bike trip data, details and info about the data -> https://www.citibikenyc.com/system-data, but for this sample demo I already downloaded and packaged the data for you! Which you can download here.
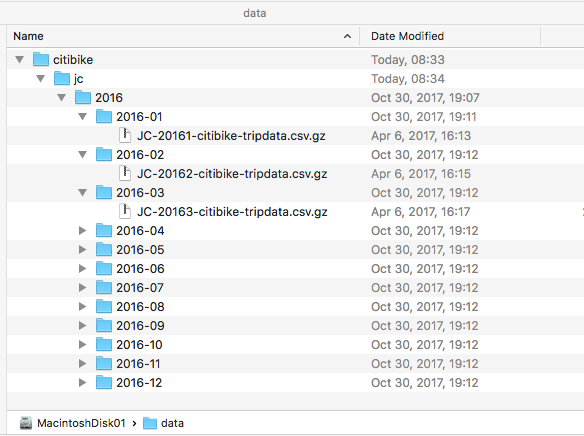
Once downloaded and unzipped the data should look like this…
Warning!
I am on macOS, all works in Windows, just don’t forget to change the file path (i.e. from “/data/citibike/jc/2016/” to “C:\data\citibike\jc\2016\". The goal is to load/copy the same “file” structure from local source (image above) to the cloud, but with a root “bucket/container” named citibike-tripdata instead of citibike. Let’s get started…

Google Cloud Storage Link to heading
Access to Google Cloud Storage from the command line is done with the gsutil Tool. Assumption is that you have selected and created a Cloud Platform project and enabled billing for your project. Next you need to install the Cloud SDK and Python 2.7 (if not already installed). To install and initialize follow these Quickstarts.
Create a bucket
mb – Make buckets. The following command creates a bucket named citibike-tripdata to a nearline storage class in the us-east-1 region:
gsutil mb -c nearline -l us-east1 gs://citibike-tripdata
Copy object(s)
cp – Copy files and objects. The following command performs a parallel (multi-threaded/multi-processing) copy of files recursively, and applies the gzip content-encoding to each:
gsutil -m cp -r -Z "/data/citibike/jc/2016/" gs://citibike-tripdata/jc/
Delete object(s)
rm – Remove objects. The following command causes bucket or bucket subdirectory contents (all objects and subdirectories that it contains) to be removed recursively:
gsutil -m rm -r gs://citibike-tripdata/jc/2016/
Delete bucket
rb – Remove buckets. Buckets must be empty before you can delete them. The following command deletes the citibike-tripdata bucket (and all of it’s subdirectories, because we deleted all objects previously):
gsutil rb gs://citibike-tripdata

Amazon S3 Link to heading
The AWS CLI is an open source tool built on top of the AWS SDK for Python that provides commands for interacting with AWS services. It uses all of the functionality provided by the AWS Management Console from your favorite terminal program. Start with Installing the AWS Command Line Interface and next configure your settings.
Create a bucket
mb – Creates an S3 bucket. The following command creates a bucket named citibike-tripdata in the ca-central-1 region:
aws s3 mb s3://citibike-tripdata --region ca-central-1
Copy object(s)
cp – Copies a local file or S3 object to another location locally or in S3. The following command copies files recursively to a STANDARD_IA (infrequent access) storage class and applies the gzip content-encoding to each:
aws s3 cp "/data/citibike/jc/2016/" s3://citibike-tripdata/jc/2016/ --storage-class STANDARD_IA --recursive --content-encoding gzip
Delete object(s)
rm – Deletes an S3 object. The following command causes bucket or bucket subdirectory contents (all objects and subdirectories that it contains) to be removed recursively:
aws s3 rm s3://citibike-tripdata/jc/2016/ --recursive
Delete bucket
rb – Deletes an empty S3 bucket. A bucket must be completely empty of objects and versioned objects before it can be deleted. The following command deletes the citibike-tripdata bucket (and all of it’s subdirectories, because we deleted all objects previously):
aws s3 rb s3://citibike-tripdata

Azure Blob Storage Link to heading
The Azure CLI and Azure PowerShell module are used to create and manage Azure resources from the command line or in scripts. AzCopy available on Windows and Linux is also an interesting command-line utility designed for high-performance copying of data to and from Azure Storage.
Both the Azure CLI and Azure PowerShell are available for macOS, Windows and Linux, but at this time for macOS and Linux, the PowerShell 6 (beta) and Azure PowerShell for .NET Core are still in beta, so the Azure PowerShell sample commands below are done on the Windows platform.
If using the Azure CLI run the login command: az login or launch the Cloud Shell and if using the Azure PowerShell run the login command: Login-AzureRmAccount.
Create a container
az storage container. The following commands creates a resource group citibiketripdata_rg, a storage account citibiketripdata, and a container citibike-tripdata:
# Create a resource group
az group create --name citibiketripdata_rg --location eastus

# Create a storage account
az storage account create \
    --name citibiketripdata \
    --resource-group citibiketripdata_rg \
    --location eastus \
    --sku Standard_LRS \
    --encryption blob

# The Azure CLI needs your storage account credentials...
export AZURE_STORAGE_ACCOUNT='PUT_YOUR_STORAGE_ACCOUNT_HERE'
export AZURE_STORAGE_ACCESS_KEY='PUT_YOUR_ACCESS_KEY_HERE'

# Create a container
az storage container create --name citibike-tripdata
New-AzureStorageContainer. The following commands creates a resource group citibiketripdata_rg, a storage account citibiketripdata, and a container citibike-tripdata:
# Create a resource group
New-AzureRmResourceGroup -Name citibiketripdata_rg -Location eastus

# Create a storage account
$storageAccount = New-AzureRmStorageAccount -ResourceGroupName citibiketripdata_rg `
  -Name "citibiketripdata" `
  -Location eastus `
  -SkuName Standard_LRS `
  -Kind Storage `
  -EnableEncryptionService Blob

$ctx = $storageAccount.Context

# Create a container
New-AzureStorageContainer -Name "citibike-tripdata" -Context $ctx -Permission Off
Copy object(s)
az storage blob upload-batch. The following command uploads files from a local directory /data/citibike/ to a blob container citibike-tripdata with gzip content-encoding
az storage blob upload-batch --destination citibike-tripdata \ --source /data/citibike/ \ --content-encoding gzip
The Set-AzureStorageBlobContent does the job, however it does not keep and copy the folder structure from our local source. So here is a PowerShell script that does exactly what we need:
$StorageAccountName = "citibiketripdata"
$StorageAccountKey = "PUT_YOUR_ACCESS_KEY_HERE"
$ContainerName = "citibike-tripdata"
$sourceFileRootDirectory = "C:\data\citibike"

function UploadFilesToAzureStorageContainer {
    [cmdletbinding()]
    param(
        $StorageAccountName,
        $StorageAccountKey,
        $ContainerName,
        $sourceFileRootDirectory,
        $Force
    )

    $ctx = New-AzureStorageContext -StorageAccountName $StorageAccountName -StorageAccountKey $StorageAccountKey
    $container = Get-AzureStorageContainer -Name $ContainerName -Context $ctx

    $container.CloudBlobContainer.Uri.AbsoluteUri
    if ($container) {
        $filesToUpload = Get-ChildItem $sourceFileRootDirectory -Recurse -File

        foreach ($x in $filesToUpload) {
            $targetPath = ($x.fullname.Substring($sourceFileRootDirectory.Length + 1)).Replace("\", "/")

            Write-Verbose "Uploading $("\" + $x.fullname.Substring($sourceFileRootDirectory.Length + 1)) to $($container.CloudBlobContainer.Uri.AbsoluteUri + "/" + $targetPath)"
            Set-AzureStorageBlobContent -File $x.fullname -Container $container.Name -Blob $targetPath -Context $ctx -Properties @{"ContentEncoding" = "gzip"} -Force:$Force | Out-Null
        }
    }
}

UploadFilesToAzureStorageContainer -StorageAccountName $StorageAccountName -StorageAccountKey $StorageAccountKey -ContainerName $ContainerName -sourceFileRootDirectory $sourceFileRootDirectory -Verbose
As mentioned earlier the AzCopy utility is another option for high-performance scriptable data transfer for Azure Storage. The following command will recursively copy data from the C:\data\citibike local folder to the citibike-tripdata container
AzCopy /Source:C:\data\citibike /Dest:https://citibiketripdata.blob.core.windows.net/citibike-tripdata /DestKey:PUT_YOUR_ACCESS_KEY_HERE /S
Delete object(s)
az storage blob delete-batch. Delete blobs from a blob container recursively
Azure-CLI
*Note: It’s documented! But at the time of writing this post, it’s not yet implemented. The following GitHub Pull Request as been approved and should be released soon. Details here -> https://github.com/Azure/azure-cli/pull/4781
Get-AzureStorageBlob -Container $ContainerName -Context $ctx | ForEach-Object {Remove-AzureStorageBlob -Blob $_.Name -Container $ContainerName -Context $ctx}
Delete container
az storage container delete. The following command marks the specified container for deletion
az storage container delete --name citibike-tripdata
Remove-AzureStorageContainer. The following command removes the specified storage container
Remove-AzureStorageContainer -Name "citibike-tripdata"
But wait! It can be easier… If you no longer need any of the resources in your resource group, including the storage account and blobs, delete the resource group with the az group delete command using Azure CLI or the Remove-AzureRmResourceGroup command in Azure PowerShell
az group delete --name citibiketripdata_rg
Remove-AzureRmResourceGroup -Name "citibiketripdata_rg"
Voilà! We are done. Need further assistance and guidance, post a comment below.
Enjoy!