Installing TimescaleDB on Azure. First some housekeeping… A time series database is a software system that is optimized for handling time series data, arrays of numbers indexed by time (a datetime or a datetime range). In some fields these time series are called profiles, curves, or traces.

Best way to learn about it is to play with it…So this post will be about:
- Setting up a Linux VM instance in Azure
- Installing TimescaleDB
- Configuring PostgreSQL
- Using TimescaleDB
Let’s do this!
Setting up a Linux VM instance in Azure Link to heading
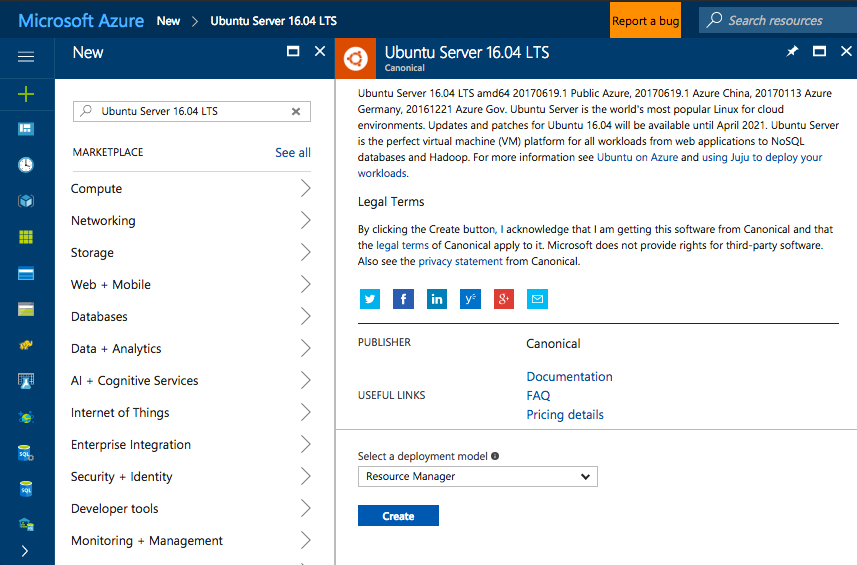
First login to your Azure portal https://portal.azure.com, if you don’t have an Azure account get started with a $250 in Credit when you Sign Up for a Free Trial here. Next we want to search the Marketplace for an Ubuntu Server 16.04 LTS image.
Once found and selected click the “Create” button to continue
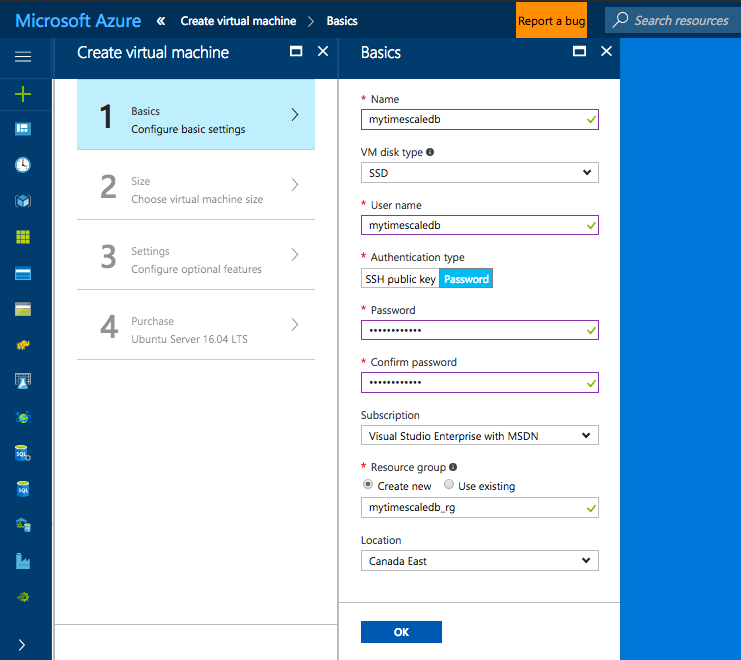
Next is the Create virtual machine wizard, first step is to provide Basic information; name, disk type, auth type… and select “OK” to continue
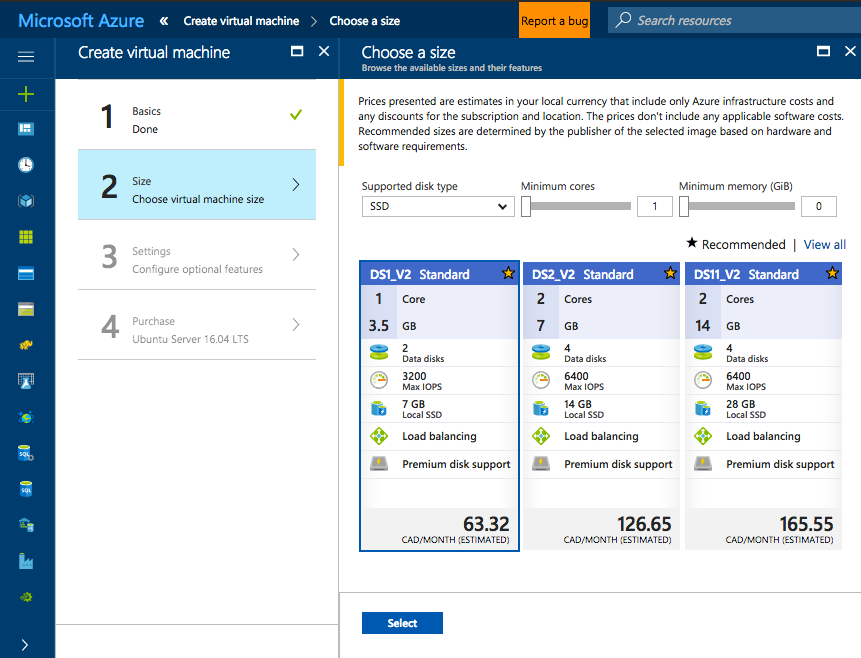
Next we need to Choose a size, for the purpose of this tutorial I selected DS1_V2 Standard a small VM instance (1 Core, 3.5 GB Memory). It goes without saying that for production workloads you would need to consider bigger VM instances. When I need to crank it up, I usually go for a DS12_V2 (4 Cores, 28 GB Memory) and attach a 1TB disk 😉
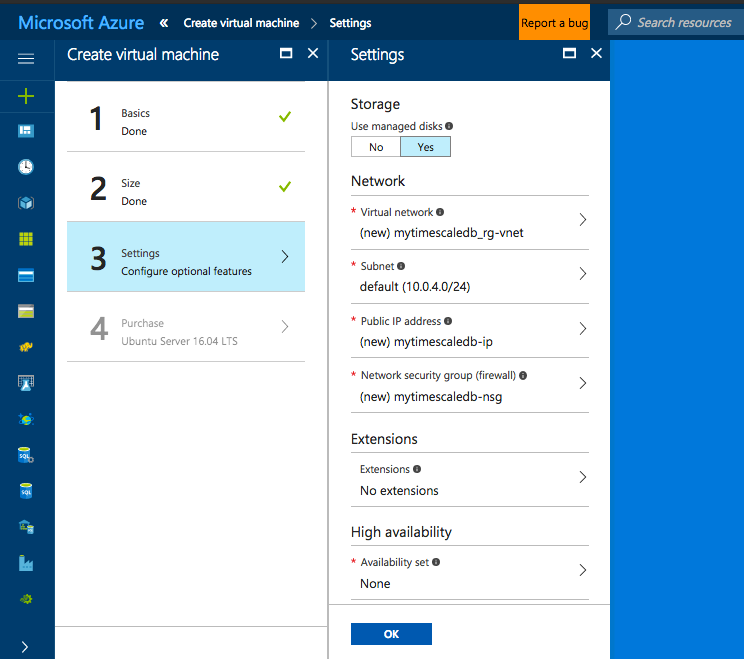
Next are the Settings, simply leave all the defaults and select “OK” to continue
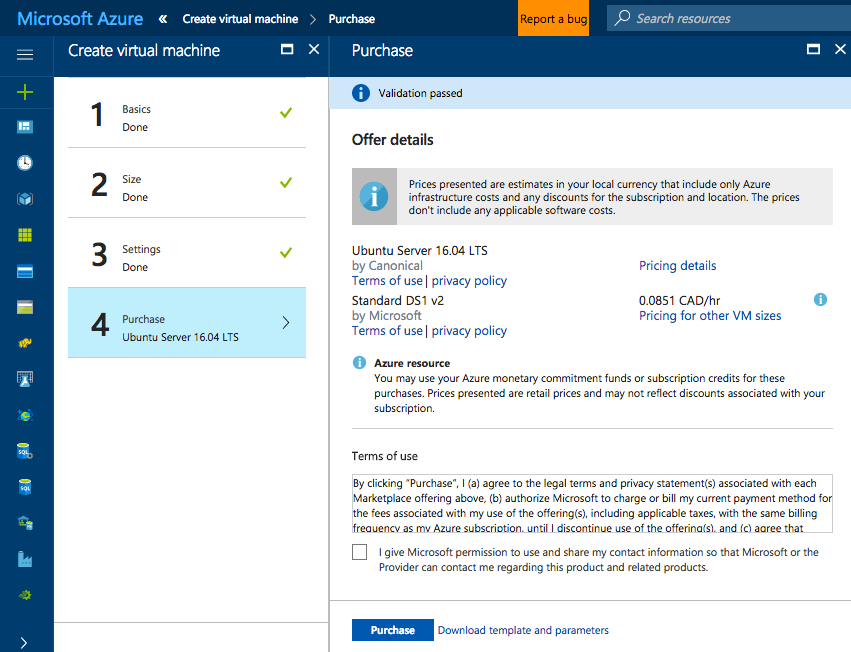
And finally the final step the confirmation, select “Purchase” to confirm and deploy
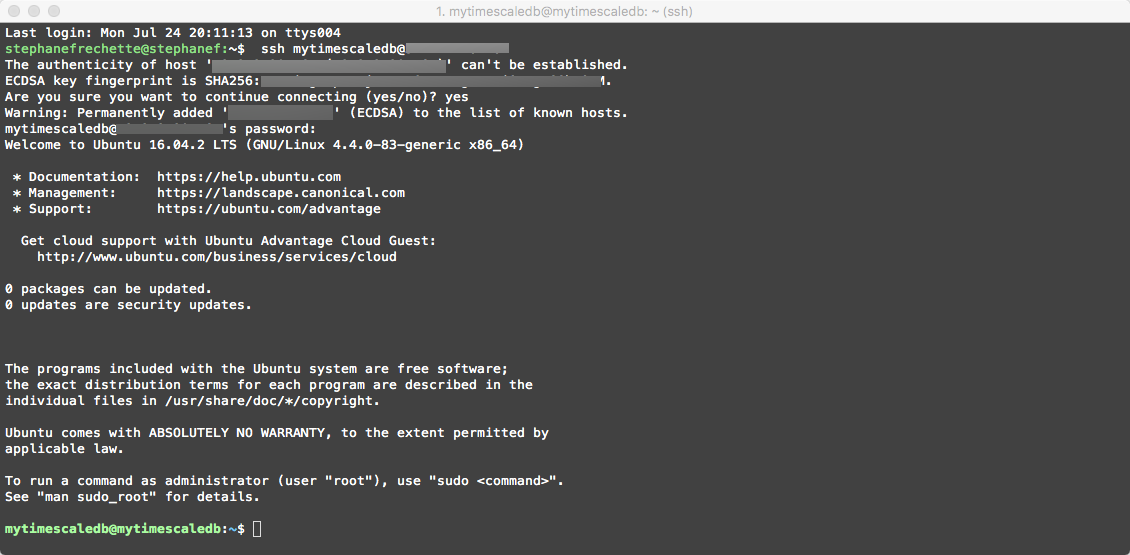
Once the deployment is successful we connect to the Linux VM using SSH. Select “Connect” and the ssh command will appear, simply copy and paste it into your terminal session

Pasting the ssh command in this case ssh mytimescaledb@[public_ip_address] and providing the password for the mytimescaledb user we have configured earlier will connect us to the Linux VM
Installing TimescaleDB Link to heading
Now that we have our Linux VM running and are signed in we need to install TimescaleDB. Issue the following commands:
# Add PPA
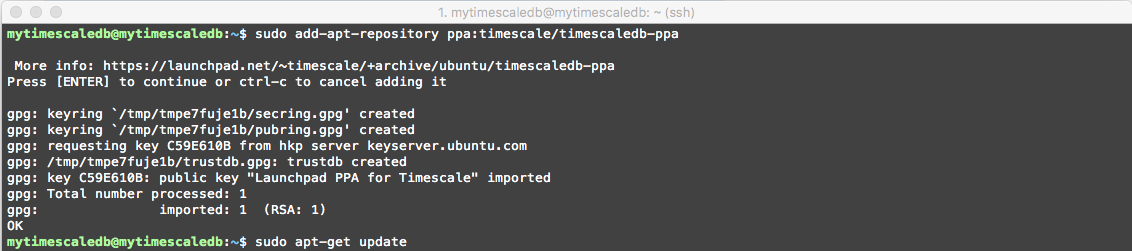
sudo add-apt-repository ppa:timescale/timescaledb-ppa
sudo apt-get update
# To install
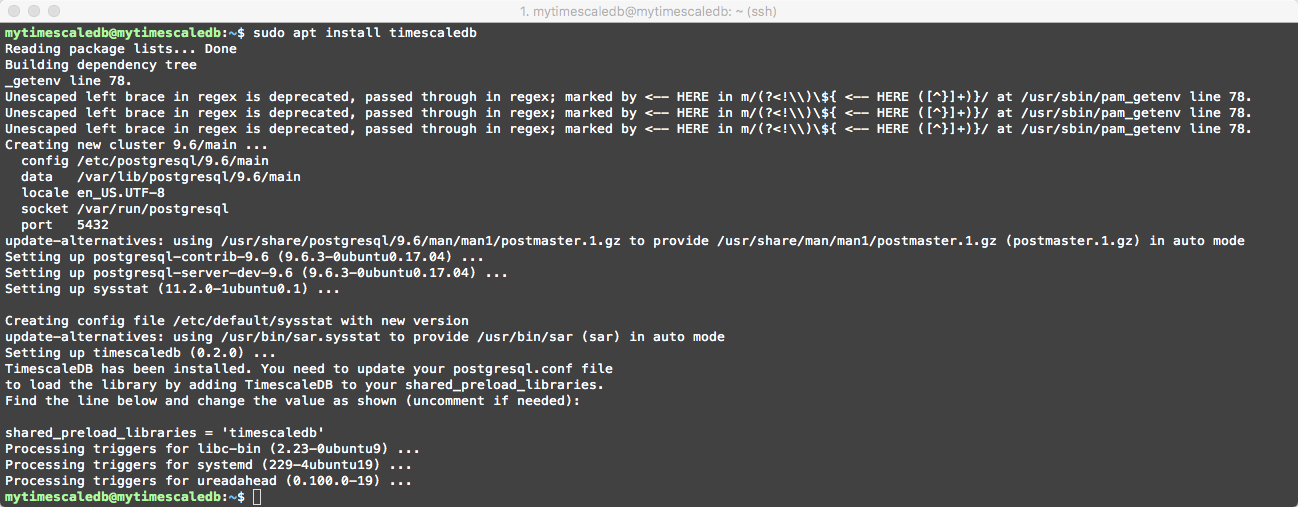
sudo apt install timescaledb-postgresql-9.6
Add the timescaledb Personal Package Archives and resynchronize the package index files… – > sudo add-apt-repository ppa:timescale/timescaledb-ppa && sudo apt-get update
Install timescaledb package -> sudo apt install timescaledb
Configuring PostgreSQL Link to heading
Next we need to update the postgresql.conf configuration file to include necessary libraries and connections and authentication information:
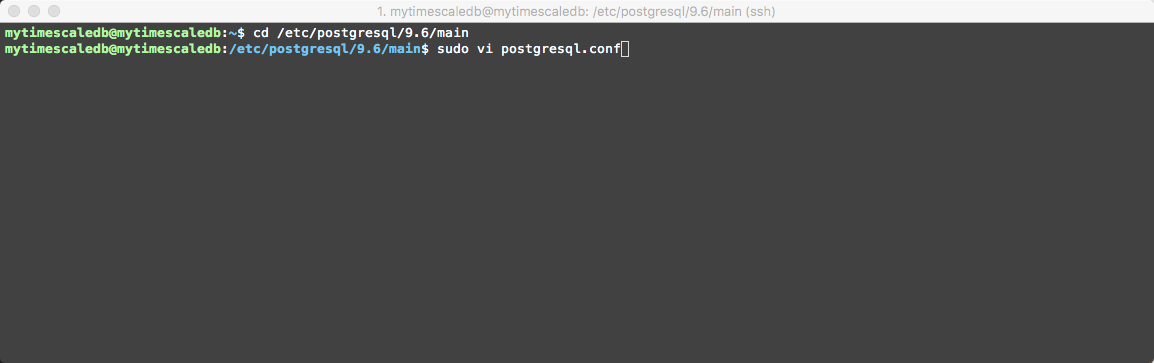
To make it happen, issue the following command to change the directory to where the postgresql.conf file is located
cd /etc/postgresql/9.6/main then issue the following sudo vi postgresql.conf command to edit the file.
First, scroll to the ‘CONNECTIONS AND AUTHENTICATION’ heading and within the ‘Connection Settings’ area (see below), uncomment the ‘listen_addresses’ attribute and add in the value ‘*’ to set all IP addresses to listen on
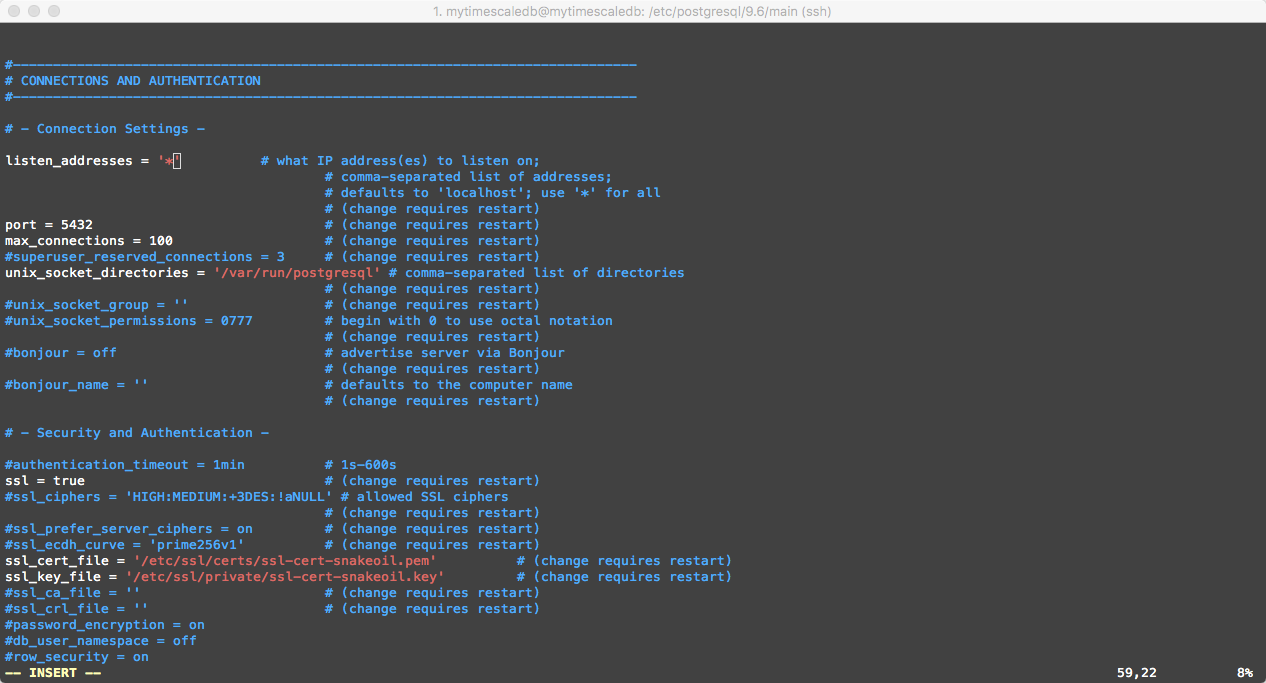
Second, scroll to the RESOURCE USAGE (except WAL) heading and uncomment the following -> #shared_preload_libraries = ” with shared_preload_libraries = ‘timescaledb’
** Need some help with basic Vim commands -> https://coderwall.com/p/adv71w/basic-vim-commands-for-getting-started.
Basically once you have scrolled and located what to edit press i for insert mode, make your changes then to save and exit issue the following command -> :wq

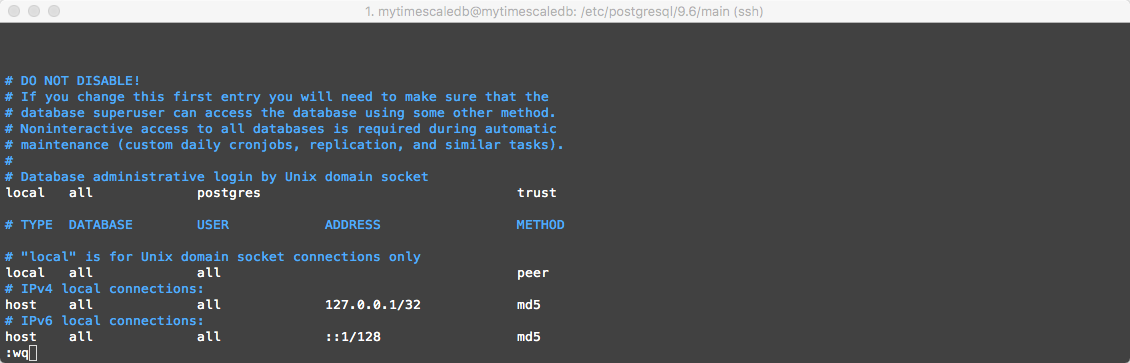
Next we need to modify and update the host-based authentication file -> pg_hba.conf
Issue the following command sudo vi pg_hba.conf
Scroll to change the following line
local all postgres peer
to
local all postgres trust
After editing should look like the following screenshot:
Finally we need to restart the postgresql service by issuing the following command sudo service postgresql restart
Using Timescaledb Link to heading
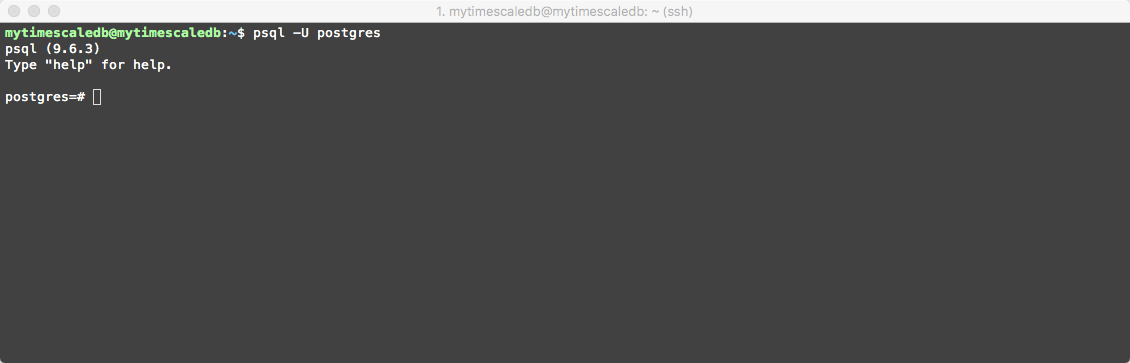
Now we can start using Timescaledb! Issue the following command to connect:
psql -U postgres
Should look something like this
Will use the Hello NYC tutorial found on the Timescale documentation site
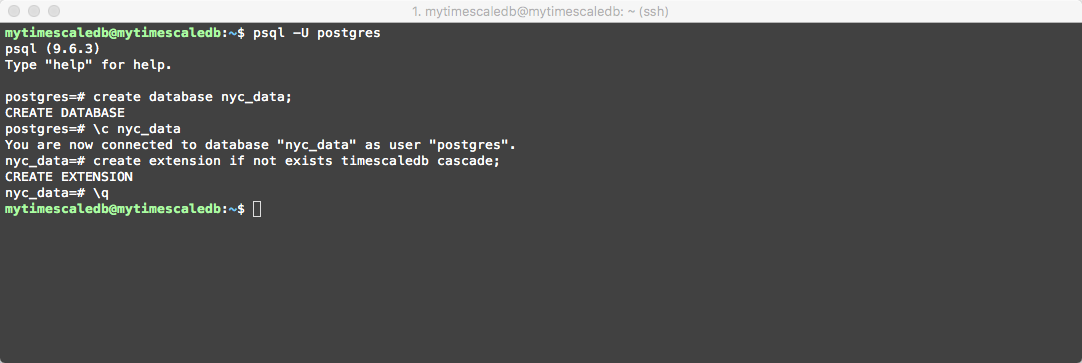
First let’s create database the nyc_data database with the timescaledb extension:
create database nyc_data;
\c nyc_data
create extension if not exists timescaledb cascade;
After you have created the database and extension issue the \q command to terminate our psql session
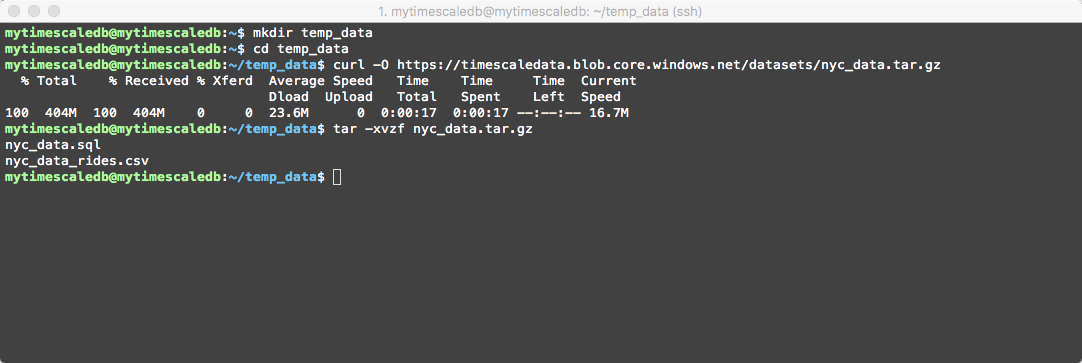
We will now proceed to download the data using curl, but first will create a new directory named temp_data to store it and then will unzip the file…(this could take up to a couple of seconds to complete)
# make directory
mkdir temp_data

# change to newly created directory
cd temp_data

# download the nyc_data dataset
curl -O https://timescaledata.blob.core.windows.net/datasets/nyc_data.tar.gz

# unzip the archive
tar -xvzf nyc_data.tar.gz
Should look something like the following
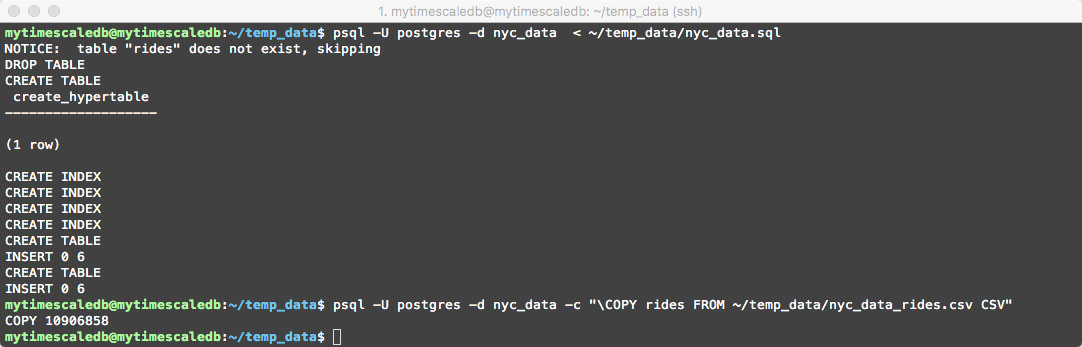
Then the following steps are to import the table schemas and data… (this could take up a couple of minutes to complete – it will be importing/copying 10,906,858 records)
# import the table schemas
psql -U postgres -d nyc_data < ~/temp_data/nyc_data.sql

# import data
psql -U postgres -d nyc_data -c "\COPY rides FROM ~/temp_data/nyc_data_rides.csv CSV"
Should look something like the following
We are now ready to issue some queries. Let’s connect to our database by issuing the following command:
psql -U postgres -d nyc_data
Our first query which TimescaleDB handles better than vanilla PostgreSQL is the following
-- Average fare amount of rides with 2+ passengers by day
SELECT date_trunc('day', pickup_datetime) as day, avg(fare_amount)
  FROM rides
  WHERE passenger_count > 1 AND pickup_datetime < '2016-01-08'
  GROUP BY day ORDER BY day;
The output should look similar to the following

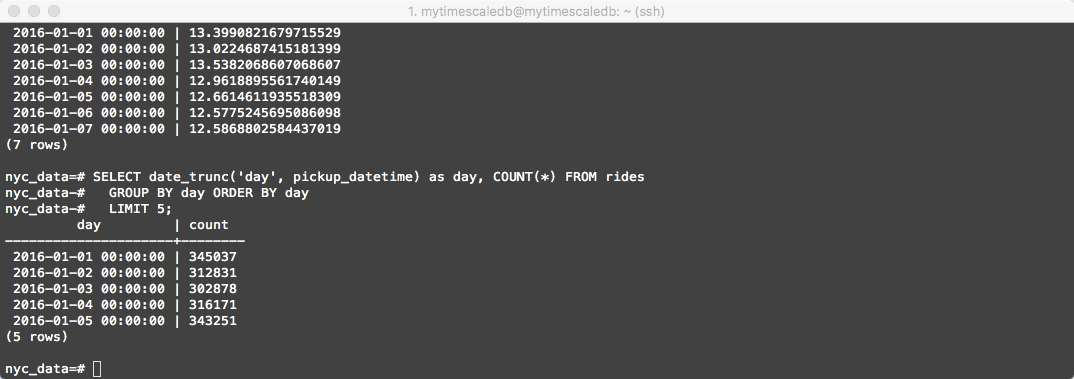
Some queries will execute over 20x faster on TimescaleDB than on vanilla PostgreSQL. Here’s one example
-- Total number of rides by day for first 5 days
SELECT date_trunc('day', pickup_datetime) as day, COUNT(*) FROM rides
  GROUP BY day ORDER BY day
  LIMIT 5;
The output should look similar to the following
Here you go, we have installed and configured TimescaleDB running on Azure! Please feel free to look up the other tutorials and sample datasets located here.
Slack -> http://slack-login.timescale.com/
Github -> https://github.com/timescale/timescaledb
Will be posting more about TimescaleDB soon…
Enjoy!