
This post is to quickly get you started and deploy a Cloud SQL for SQL Server managed instance that is not intended for production use! You will mostly use all defaults when configuring your instance, in a future post we will go deeper on how to configure for Backups and High Availability, connectivity with Private IP and restoring backups.
For a list of major features and capabilities (supported and unsupported) for the Cloud SQL for SQL Server beta, please refer to the following page -> Cloud SQL for SQL Server features.
Let’s get started!
Log on to the GCP console Link to heading
First go to the GCP console and log in using your Google account.
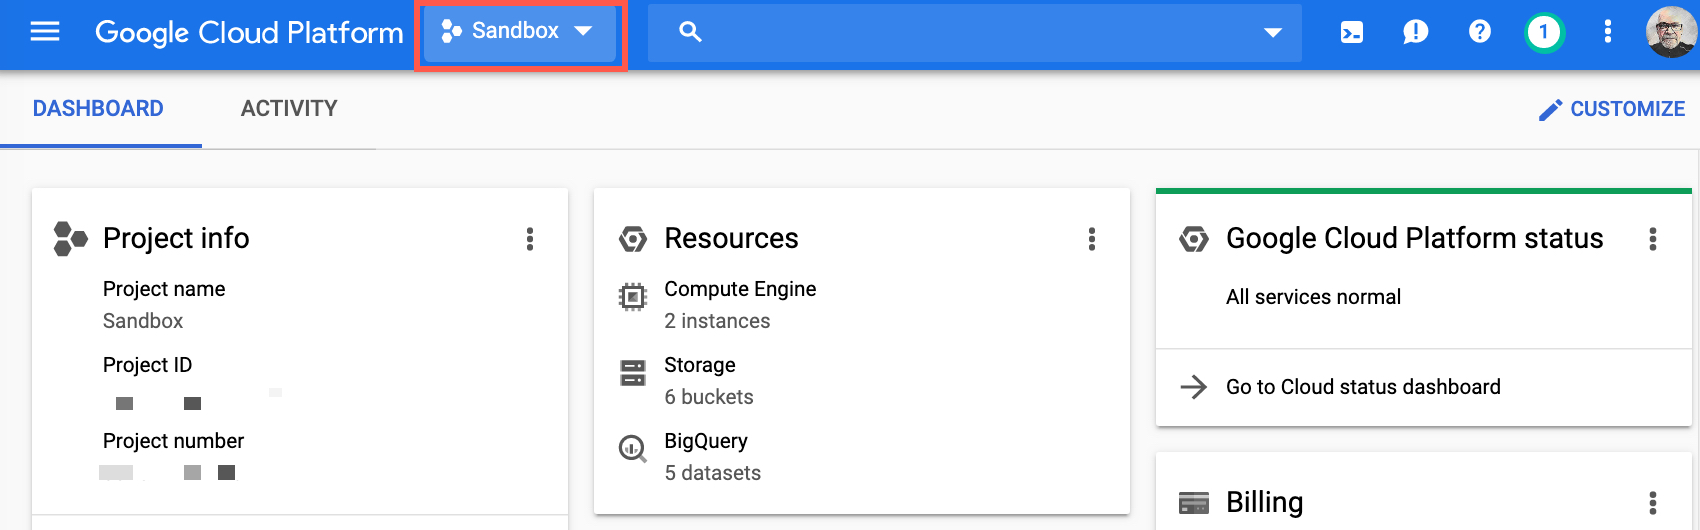
Selecting a GCP project Link to heading
You need to select a project. If you don’t have any projects then go to the project selector page to create one - For this demonstration I have created and using a specific project named Sandbox.
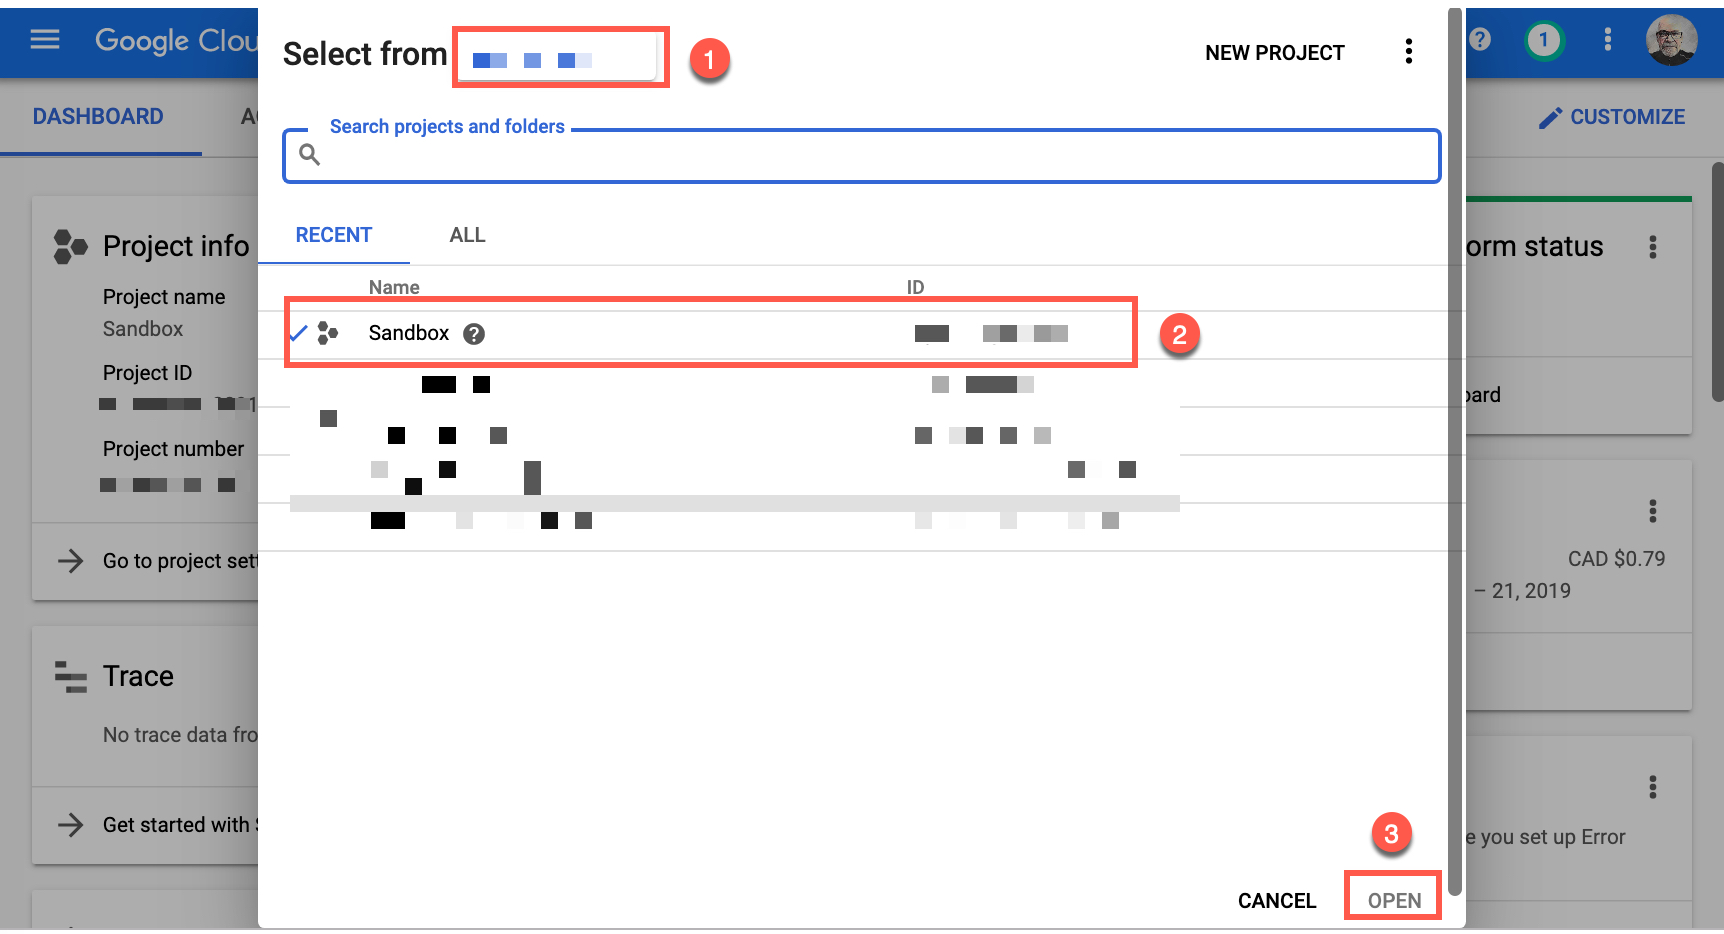
If the GCP project you want to use is not the one shown or selected, click the organization name (1), then select the name of the GCP project you want to use (2), and click on Open (3).
Cloud SQL Link to heading
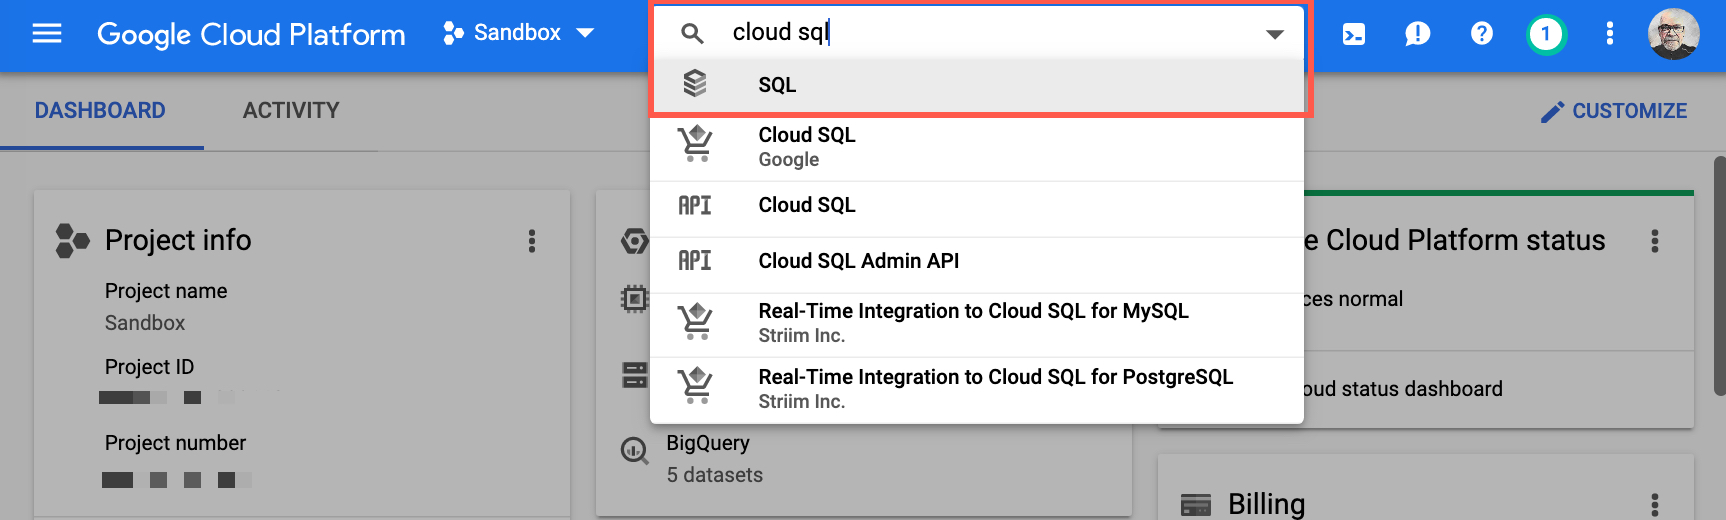
Go to the Cloud SQL page, you can do this by typing cloud sql in the resources and products search field and select SQL.
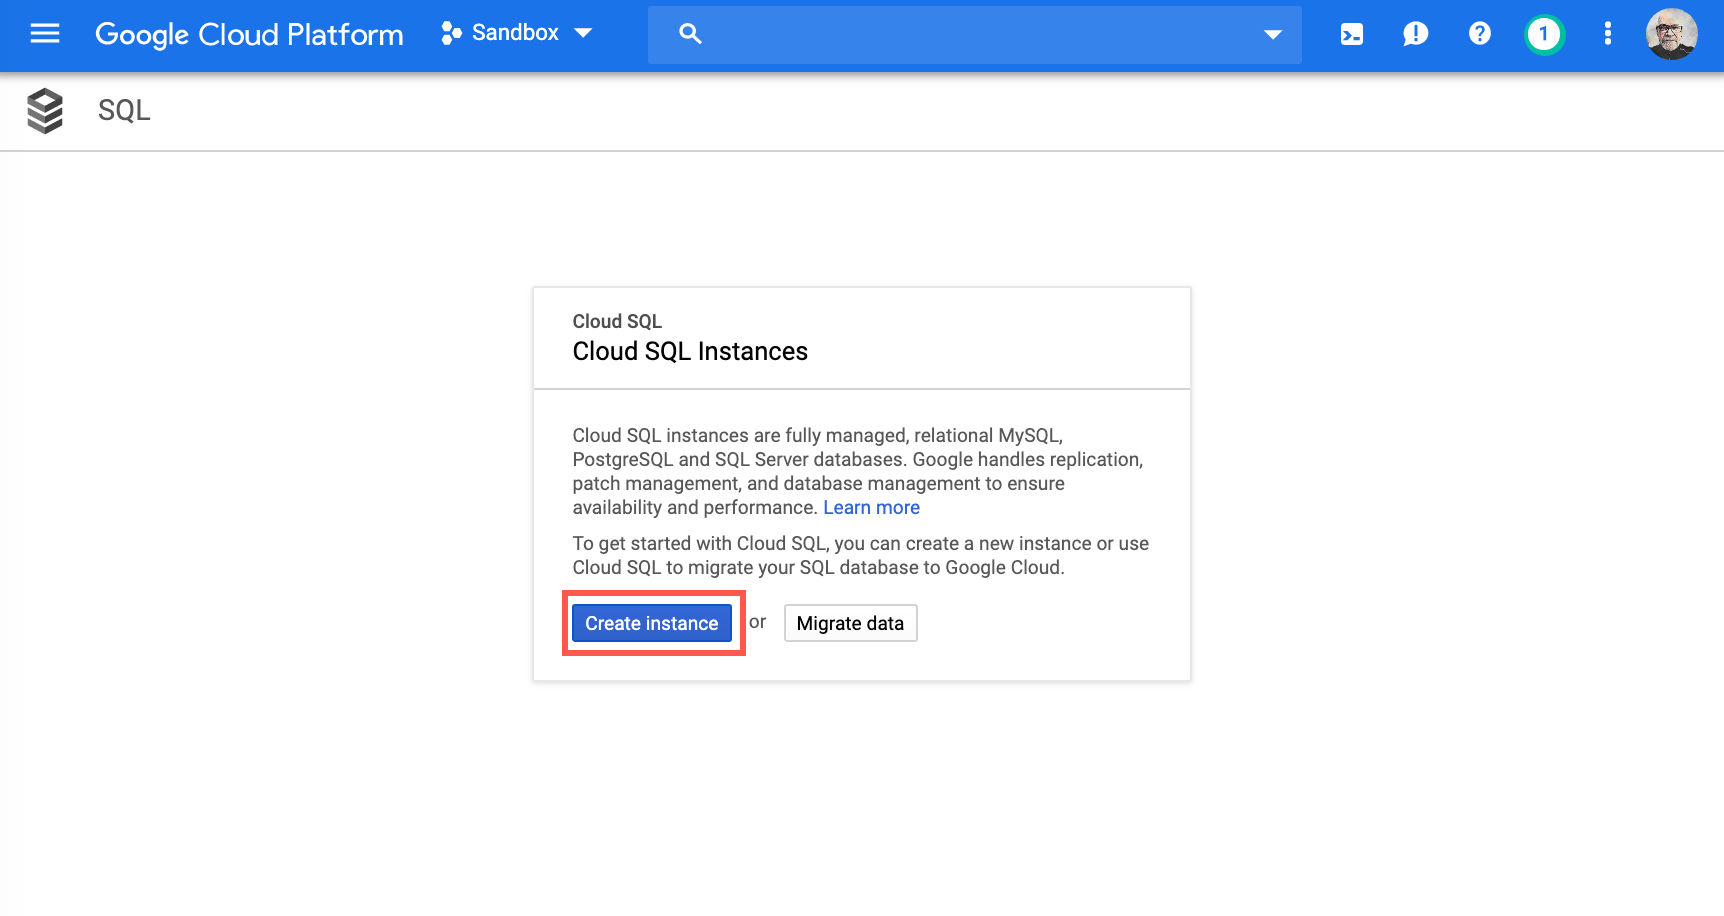
Click on Create instance
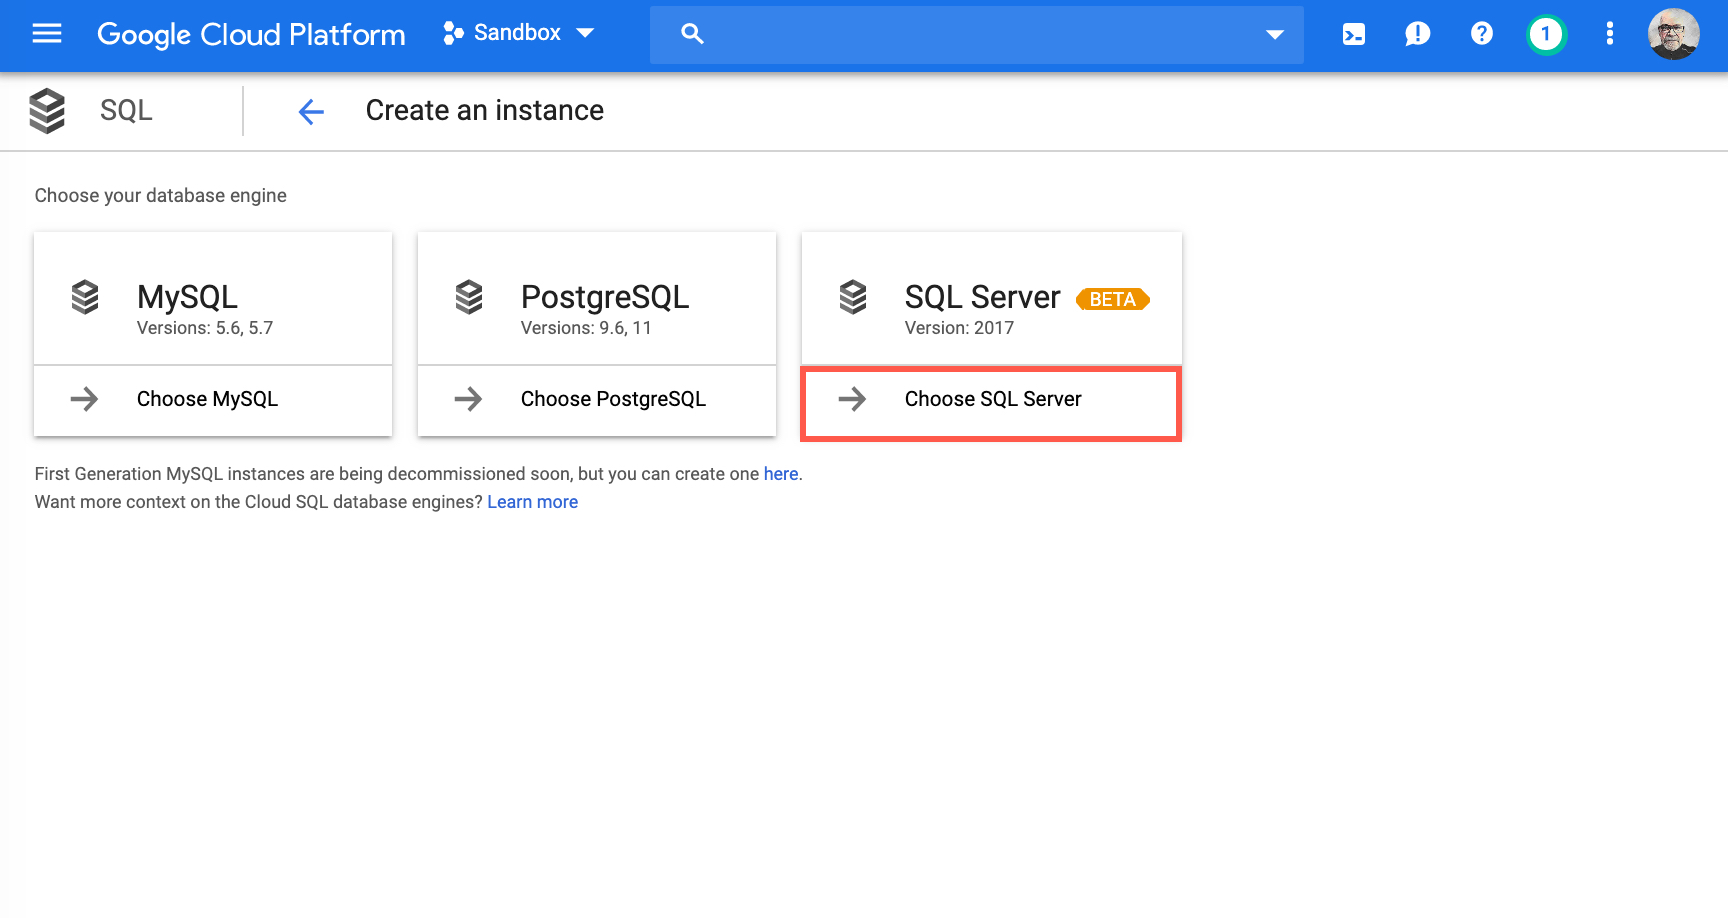
Select Choose SQL Server
Create a SQL Server instance Link to heading
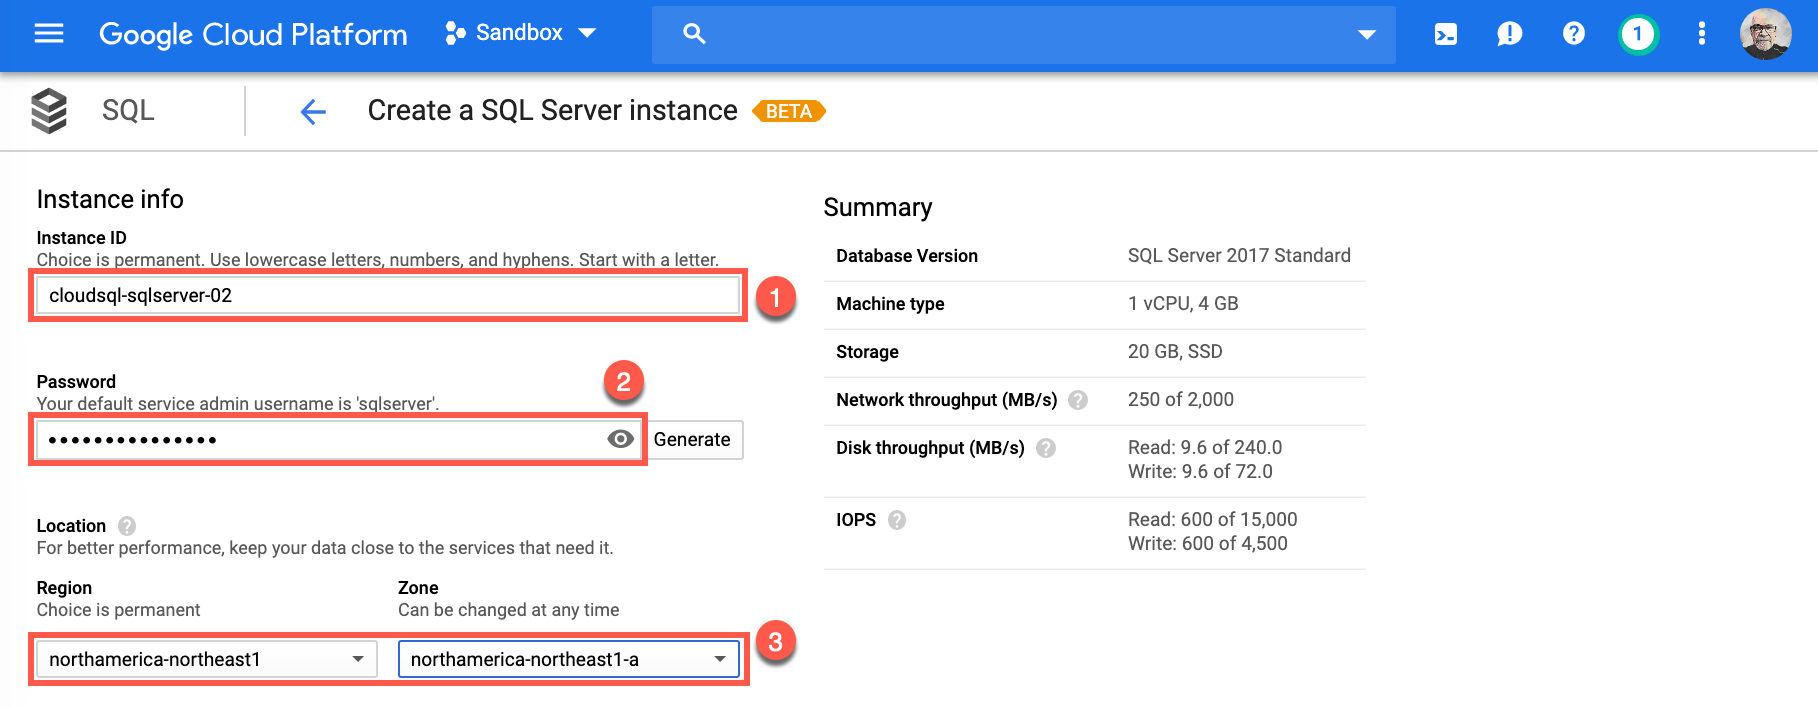
You are now ready to start configuring your managed instance of SQL Server. For demonstration purposes I have included my config. information, please make sure to provide/replace with your own information to setup your own instance.
- Provide a name for your instance, for my Instance ID I chose
cloudsql-sqlserver-02 - Provide a strong password for your default service admin username. Remember the default user name is
sqlserver - Choose Region and Zone, for my Instance I chose region:
northamerica-northeast1and zone:northamerica-northeast1a
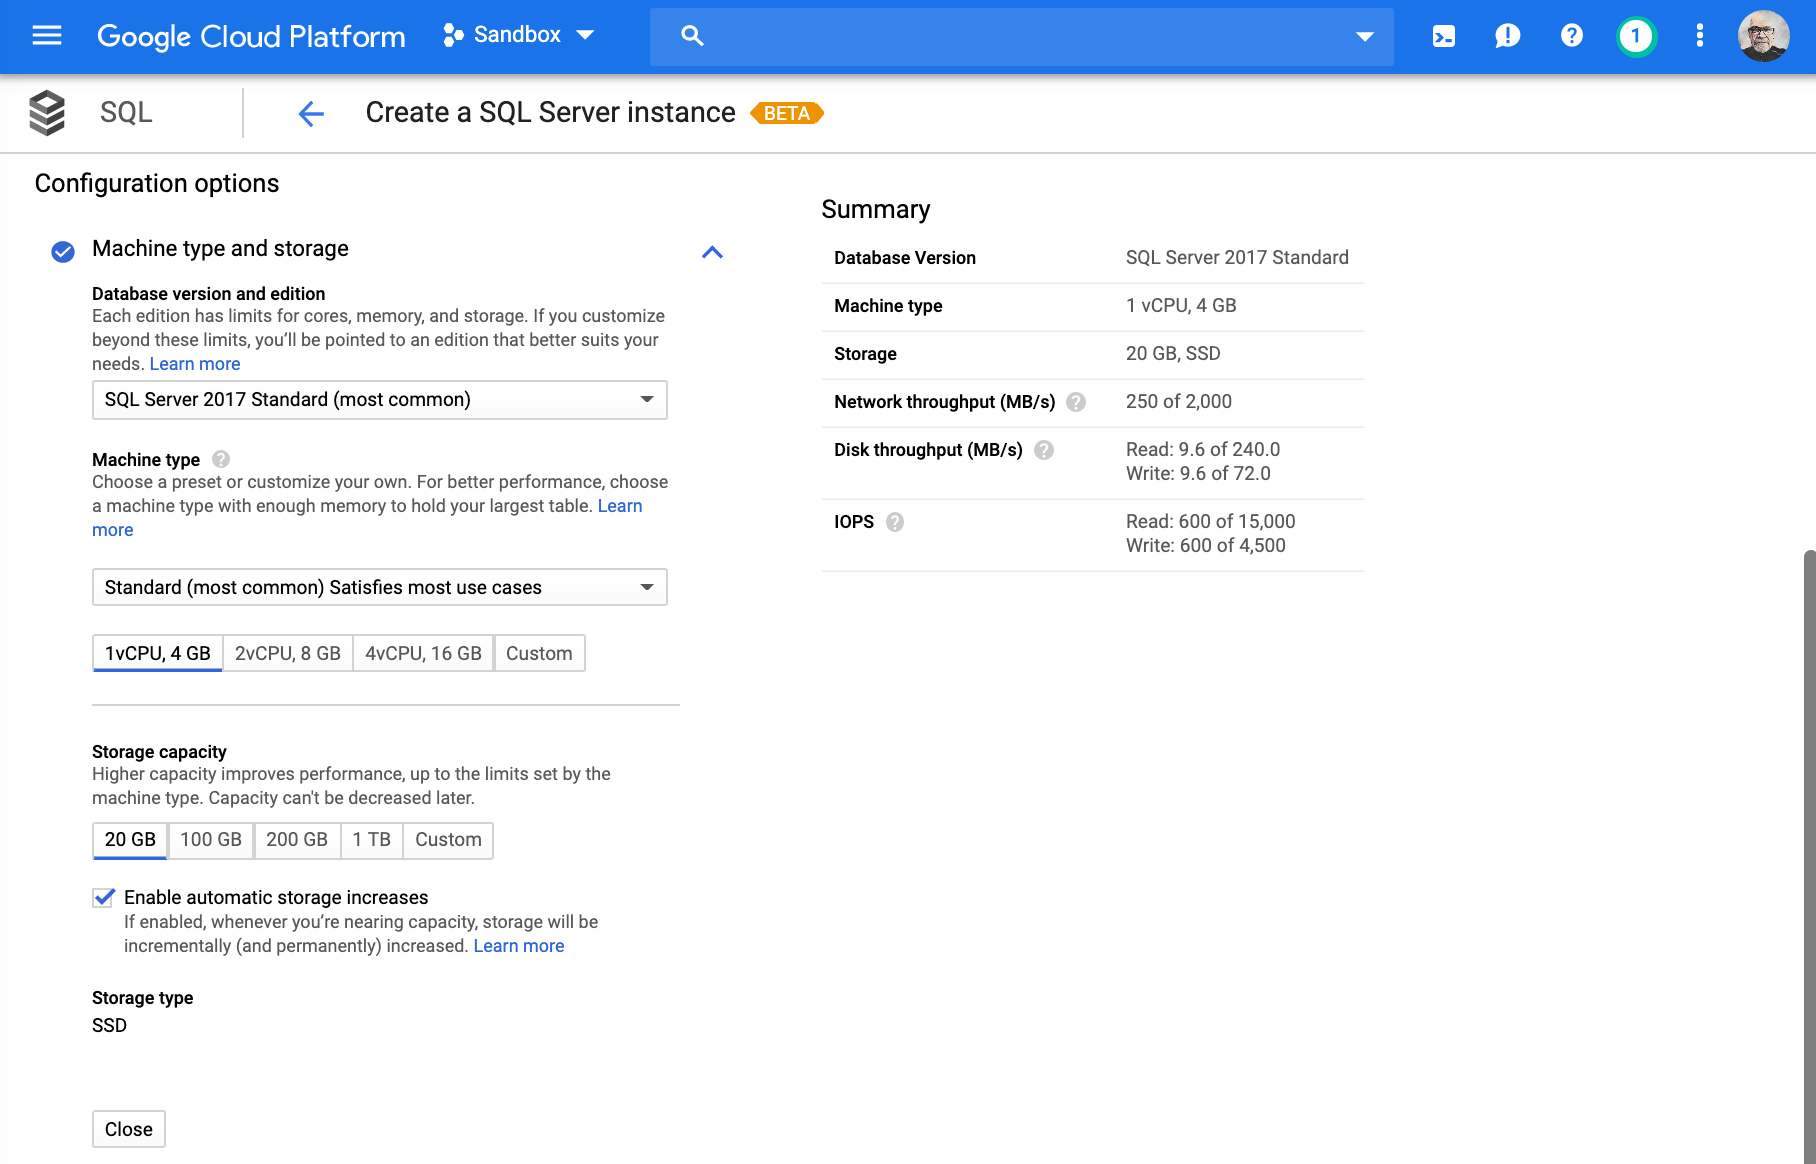
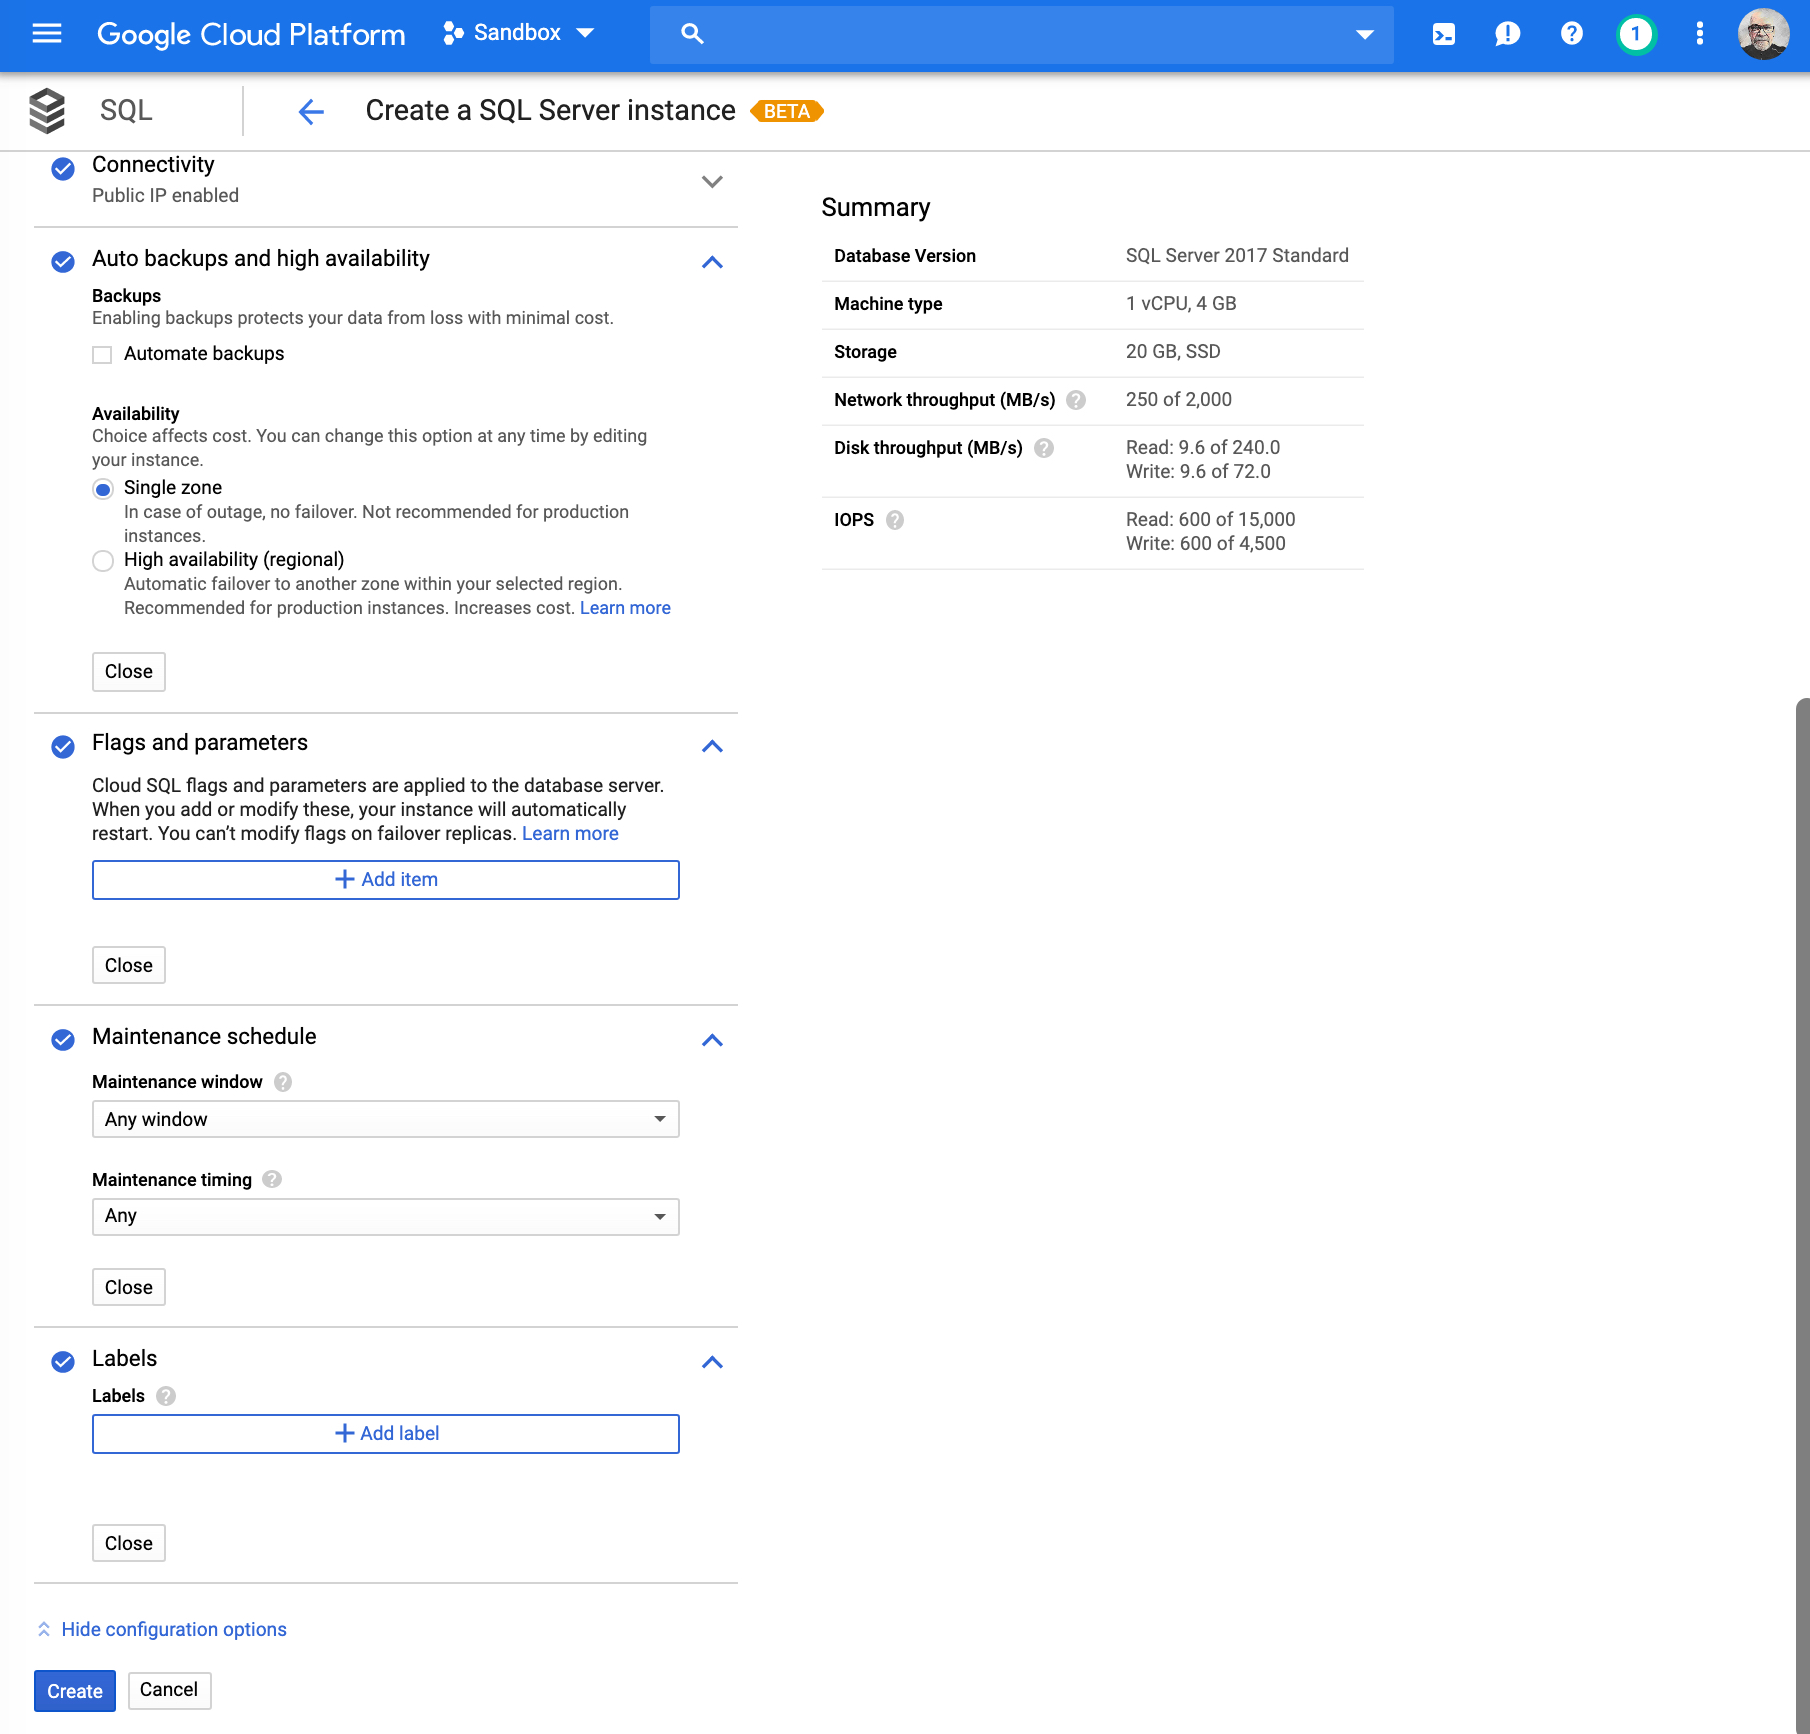
Before you select Create, as mentioned earlier you will now use all defaults for configurations. Let’s at least walkthrough them:
- Machine type and storage:
This is where you would choose which database version and edition you would need. Machine type, compute needs and storage capacity. Accept default and select Close.
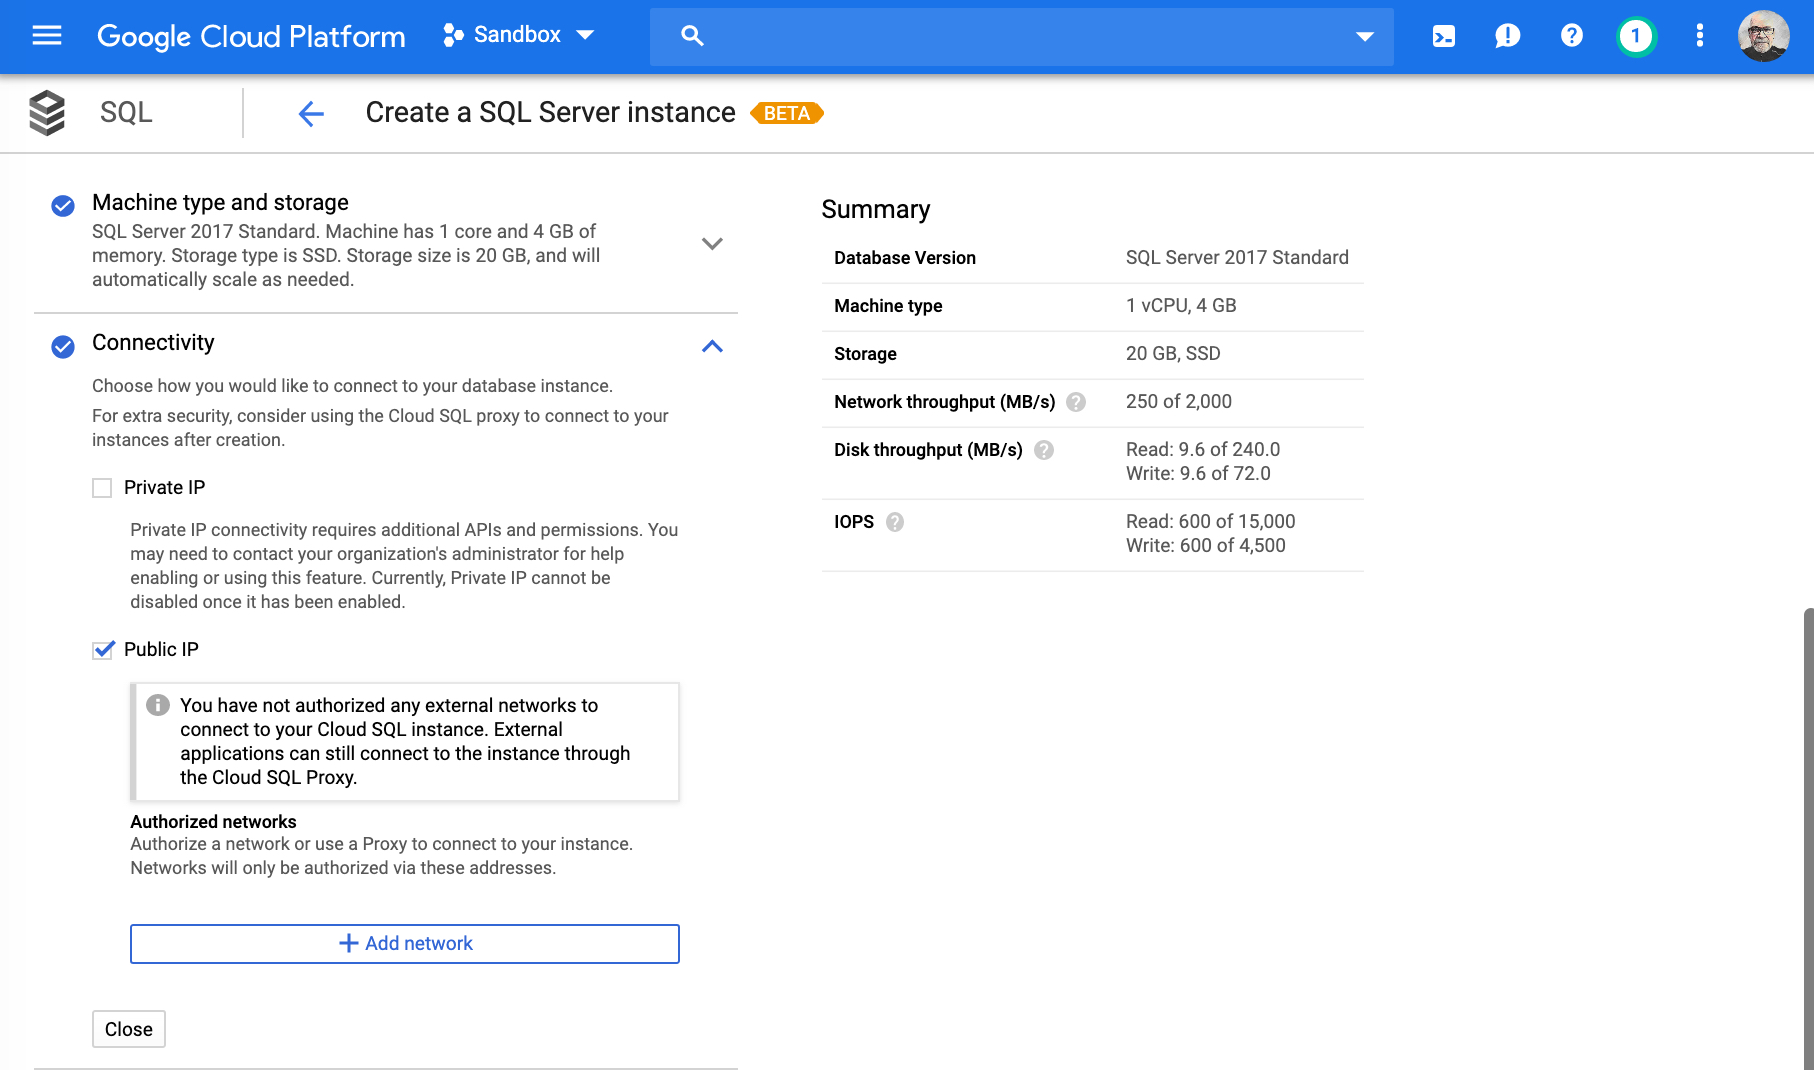
- Connectivity:
This is where you would choose how to connect to your database instance. For now will use Public IP and will create a Cloud SQL Proxy later on to enable us to connect. Accept defaults and select Close.
- Auto backups and high availability:
This is where you decide if you want to enable ‘Automate backups’, and if you wish to have High Availability (regional) coverage for your instance. - Flags and parameters:
Where you would choose and include Cloud SQL flag and parameters for your database server. - Maintenance schedule:
Maintenance window and timing selection - Labels
Once all defaults have been accepted, you can now select Create to deploy your instance. This might take a few minutes to complete.
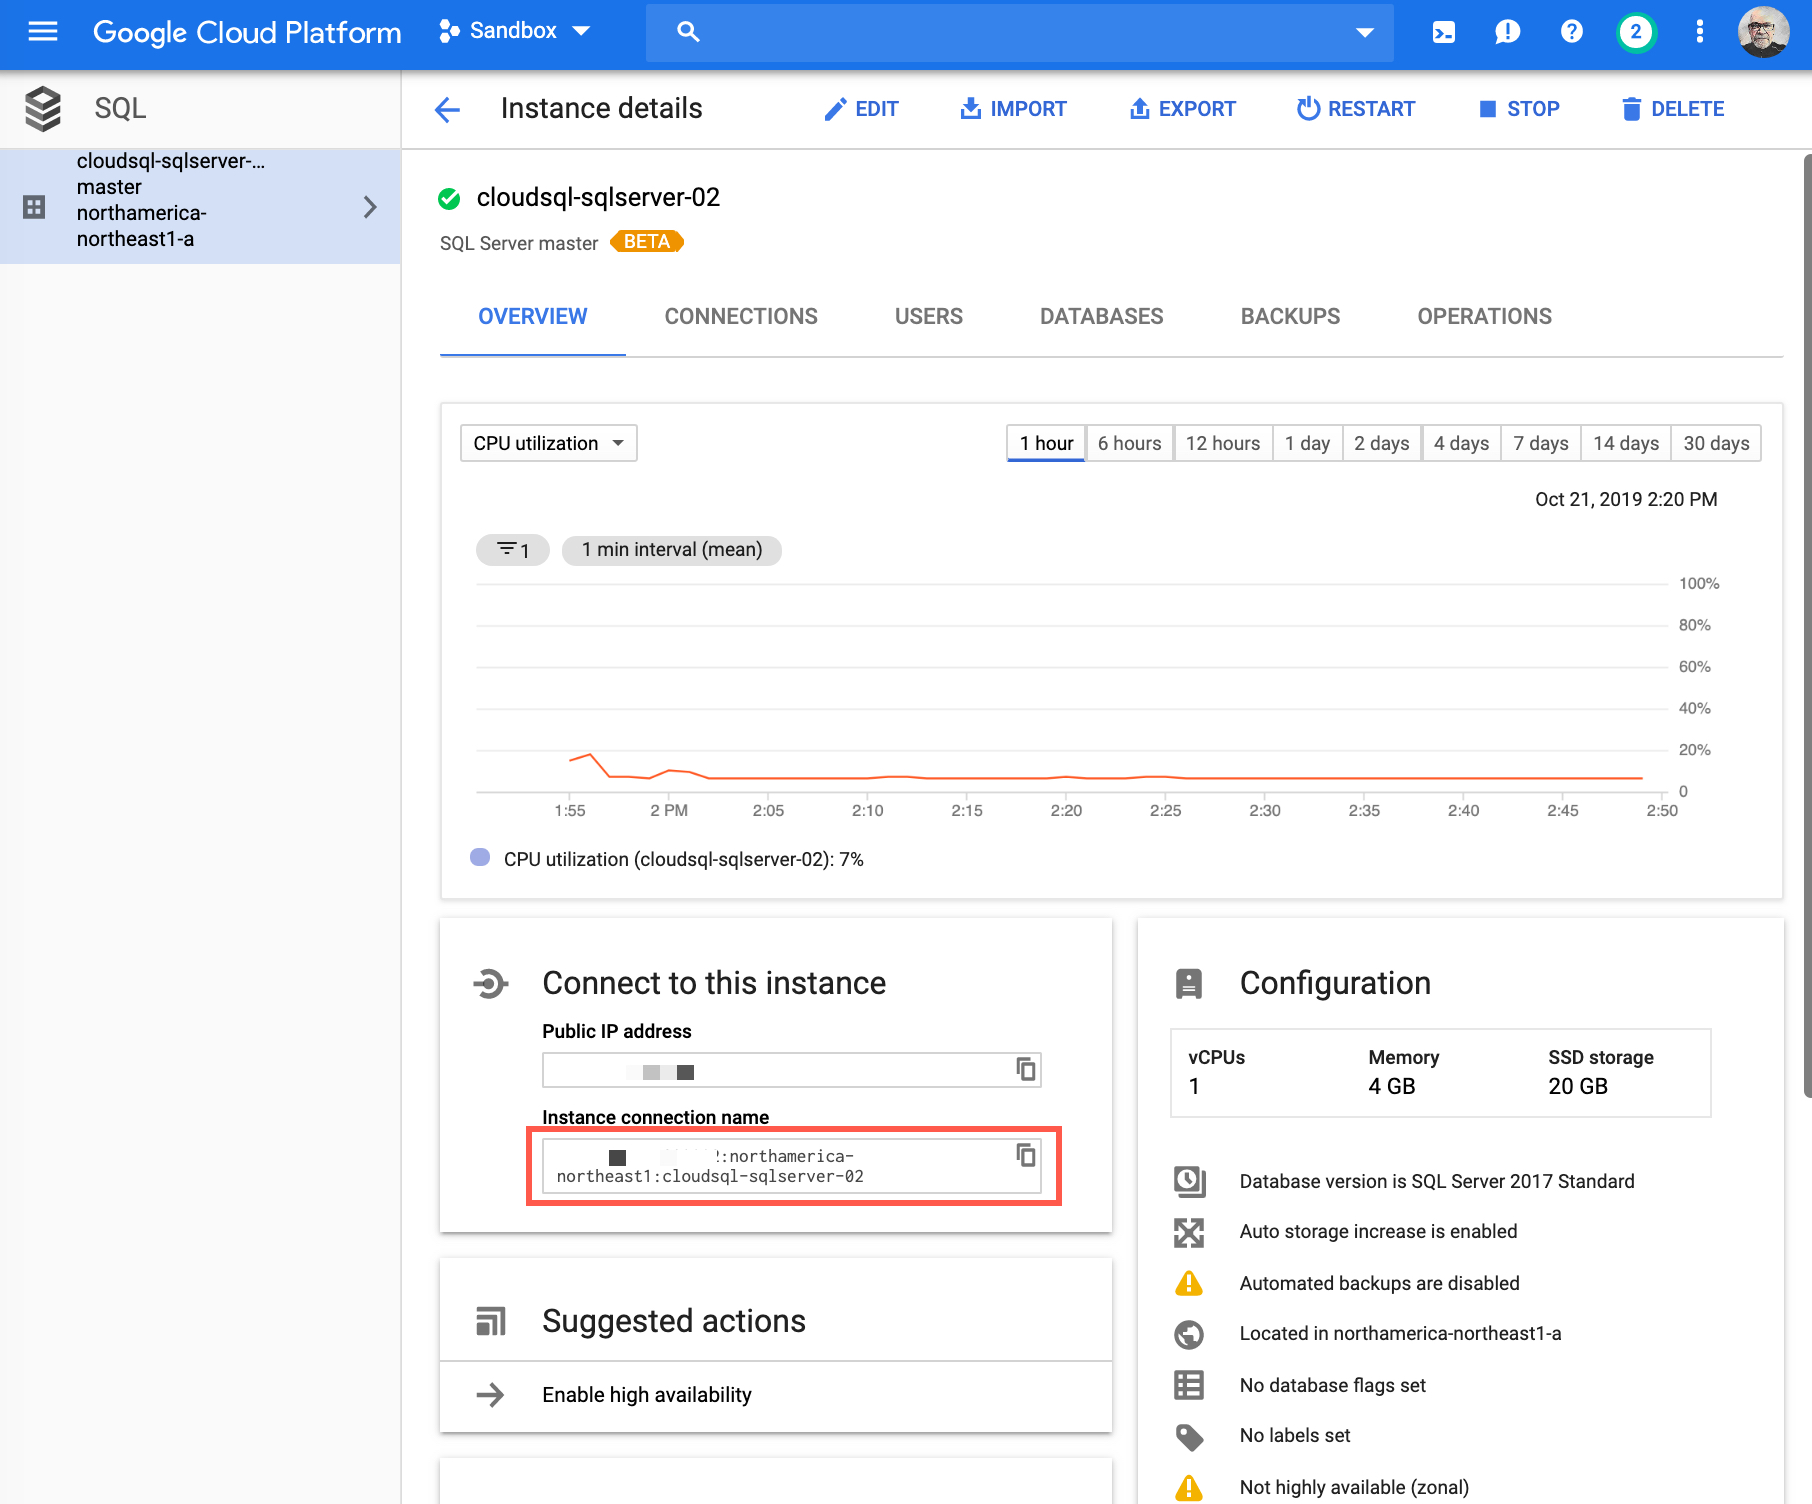
Once your instance is created and deployed, click on it to go to the Instance details page.
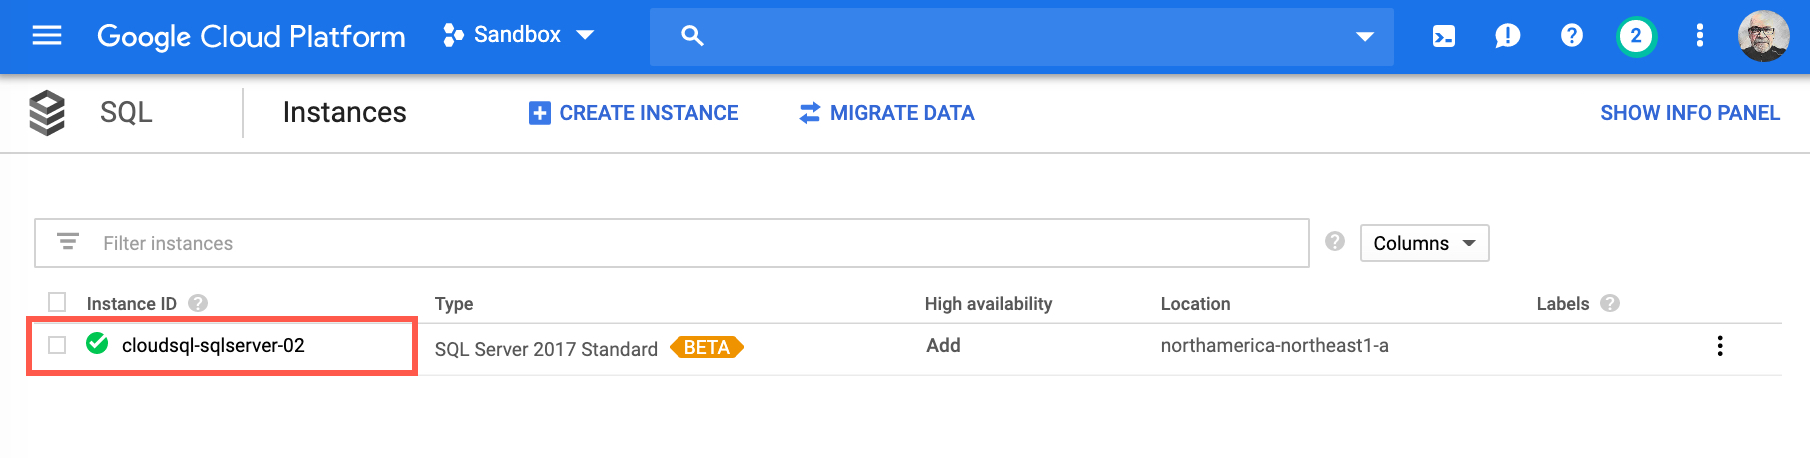
You can now browse and familiarize yourself with your instance, but for now the important thing is to copy or remember for later use the Instance connection name from the Connect to this instance section to use with the Cloud SQL Proxy…
Cloud SQL Proxy Link to heading
Next step is for you to install the Cloud SQL Proxy. The Cloud SQL Proxy provides secure access to your Cloud SQL Second Generation instances without having to whitelist IP addresses or configure SSL.
It’s important to follow the steps outlined in the following page Quickstart for using the proxy for local testing which shows you how to install and connect to Cloud SQL from a local test environment using the Cloud SQL Proxy. Connecting through the proxy enables you to test an App Engine application in your local environment, or establish a secure connection for database administration.
Steps you will need to perform:
- Enable the Cloud SQL API
- Install and authenticate the gcloud command-line tool
- Install the Cloud SQL Proxy client on your local machine
- Get the instance connection name (information copied earlier)
- Optional - Connect to your database using the sqlcmd client Connect to your instance (skip this step and use the following section Connecting to your SQL Server instance to connect)
Connecting to your SQL Server instance Link to heading
As outlined in the previous section you can connect with sqlcmd, but you can also use other tools. Depending on which OS platform you are using, the following is a list of tools you can download and use to connect to your instance.
- sqlcmd: Windows or Linux/macOS
- mssql-cli command line query tool for SQL Server
- SQL Server Management Studio (SSMS)
- Azure Data Studio
For the purpose of this demonstration I am using the mssql-cli and Azure Data Studio running on macOS.
First thing is to start the Cloud SQL Proxy, remember to replace <INSTANCE_CONNECTION_NAME> with your Instance connection name copied earlier, located on the Instance details page.
./cloud_sql_proxy -instances=<INSTANCE_CONNECTION_NAME>=tcp:1433
The output is similar to the following:

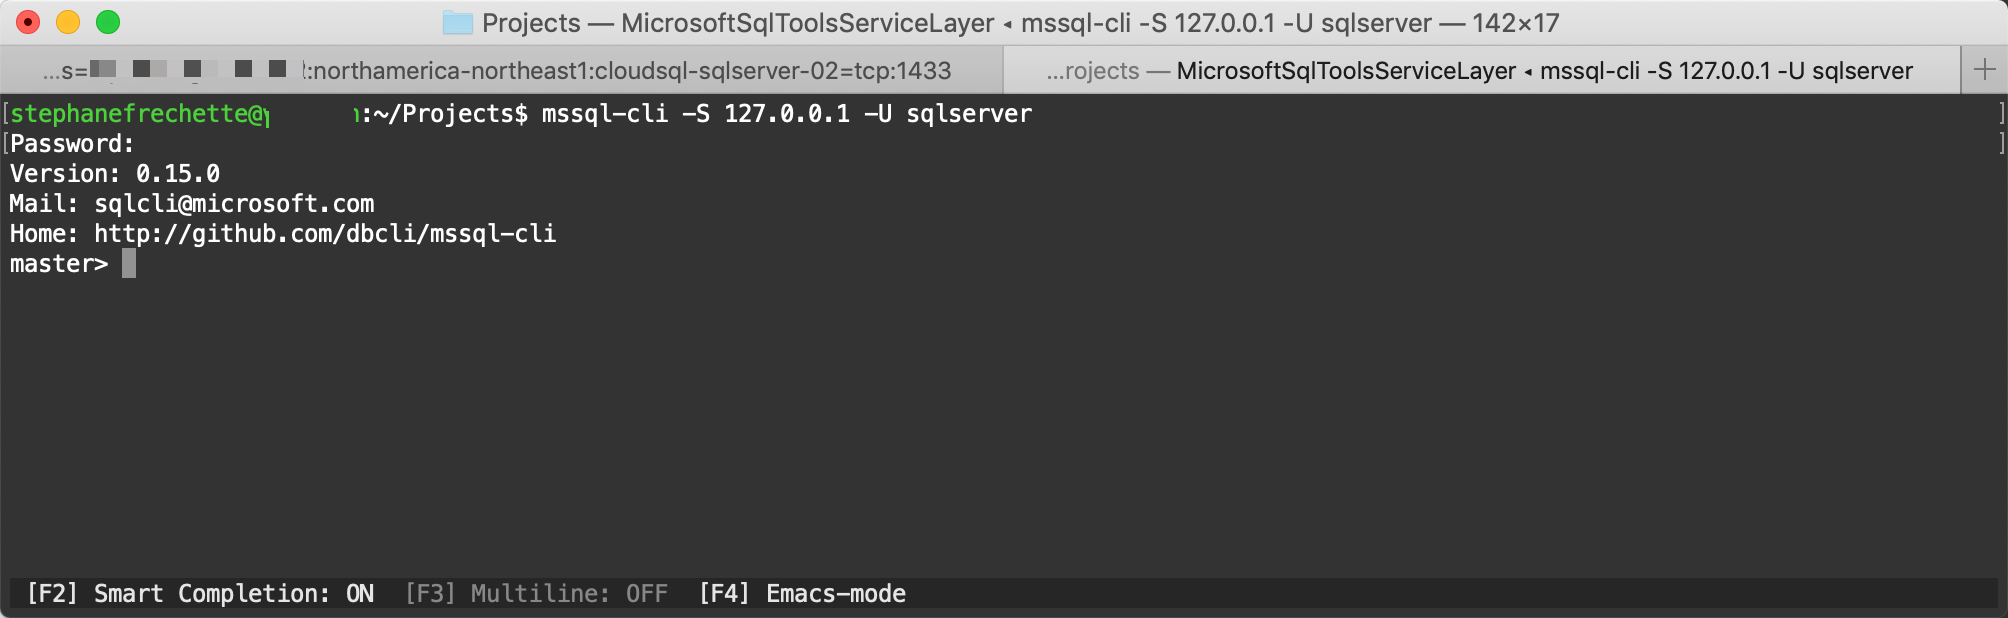
Now that the proxy is ready for new connections, using mssql-cli connect to you instance by issuing the following command:
mssql-cli -S 127.0.0.1 -U sqlserver
The output is similar to the following:
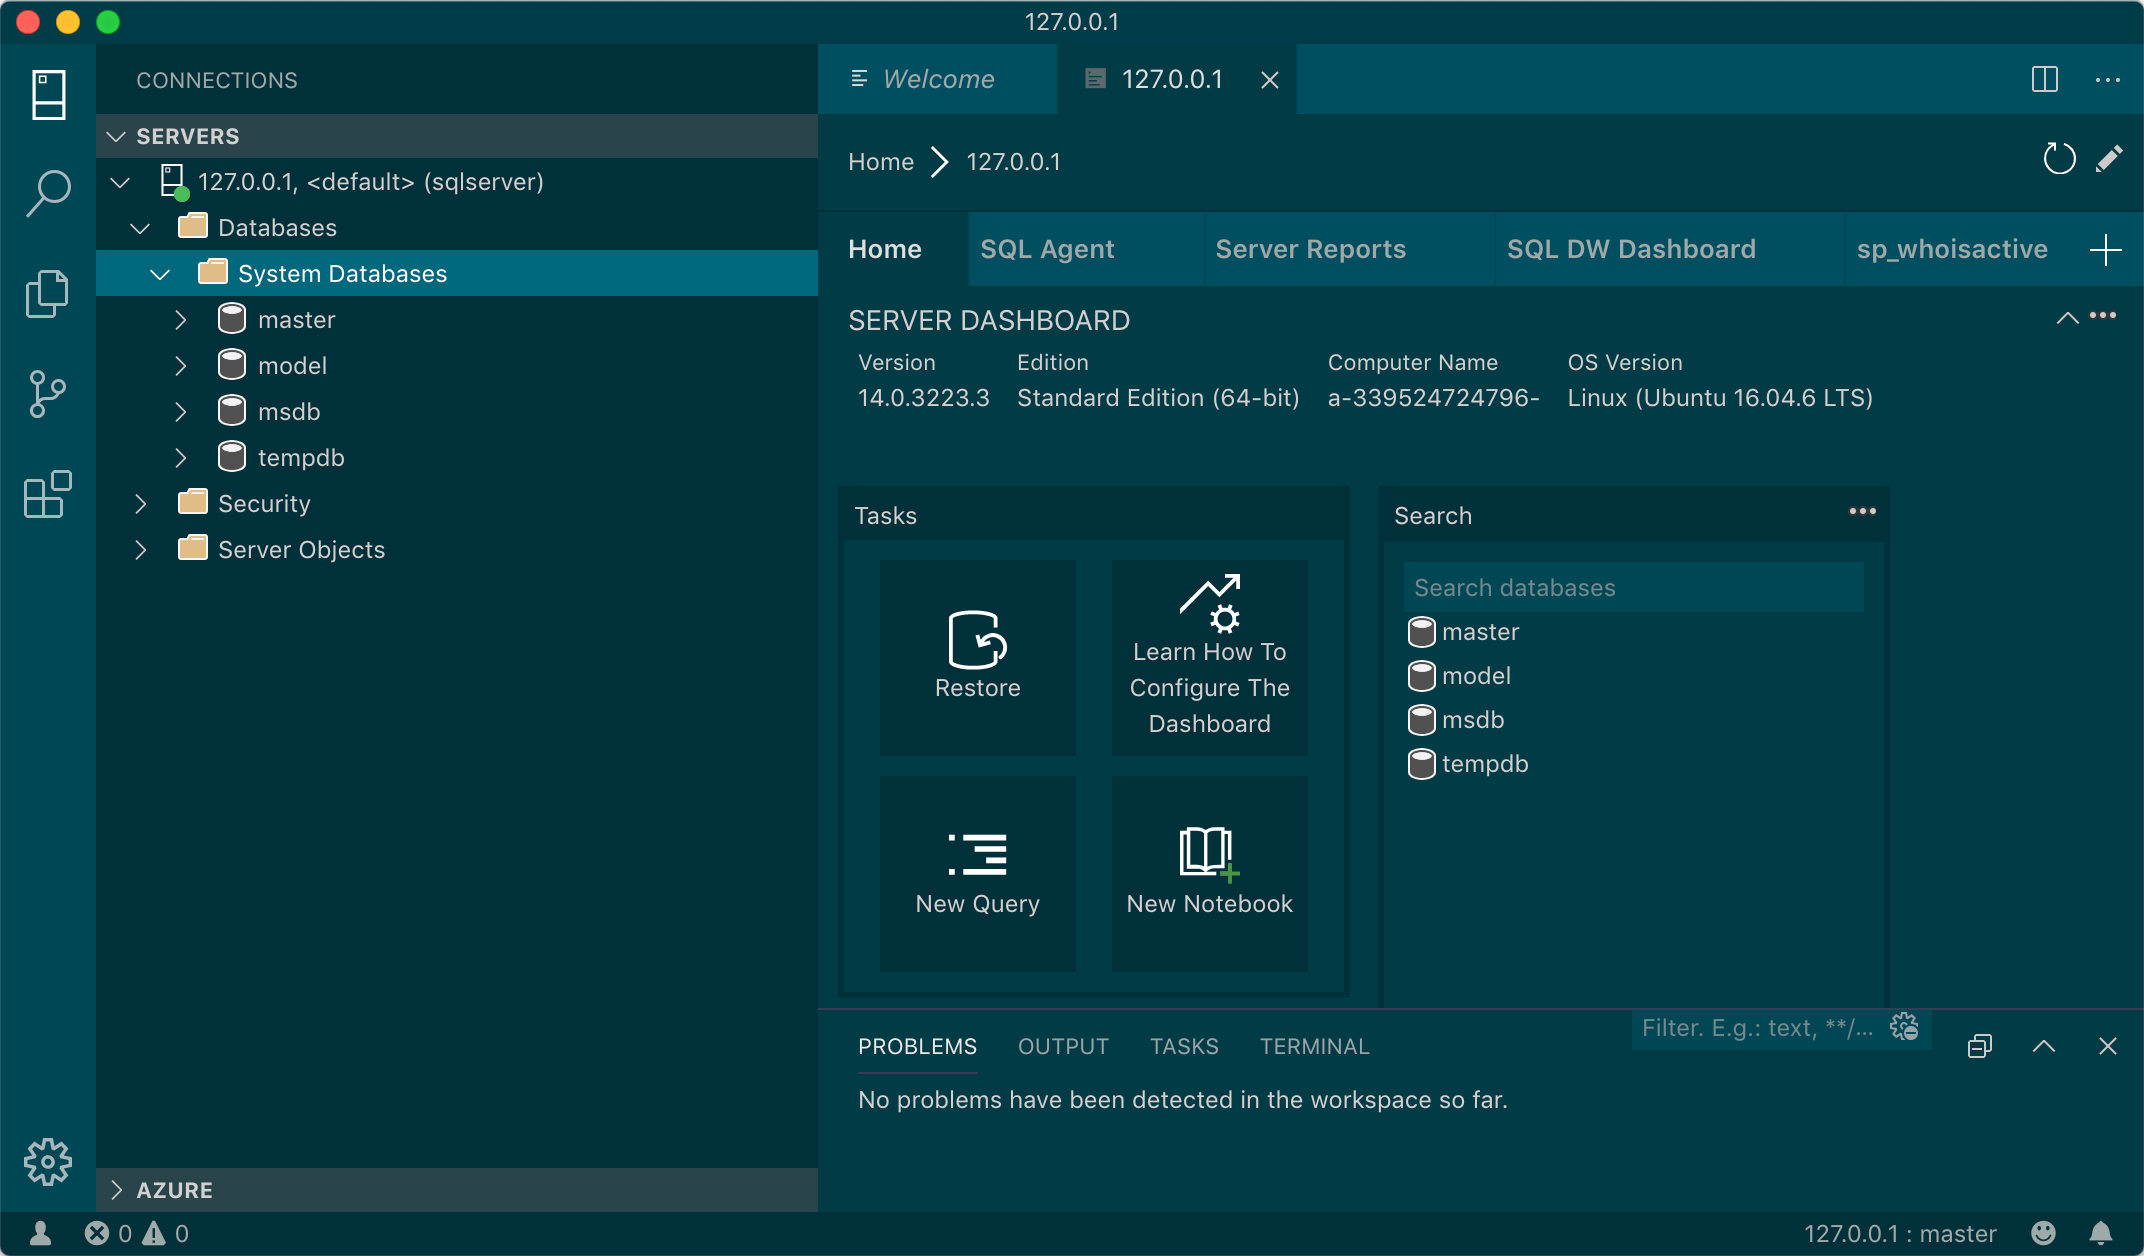
Connecting using Azure Data Studio
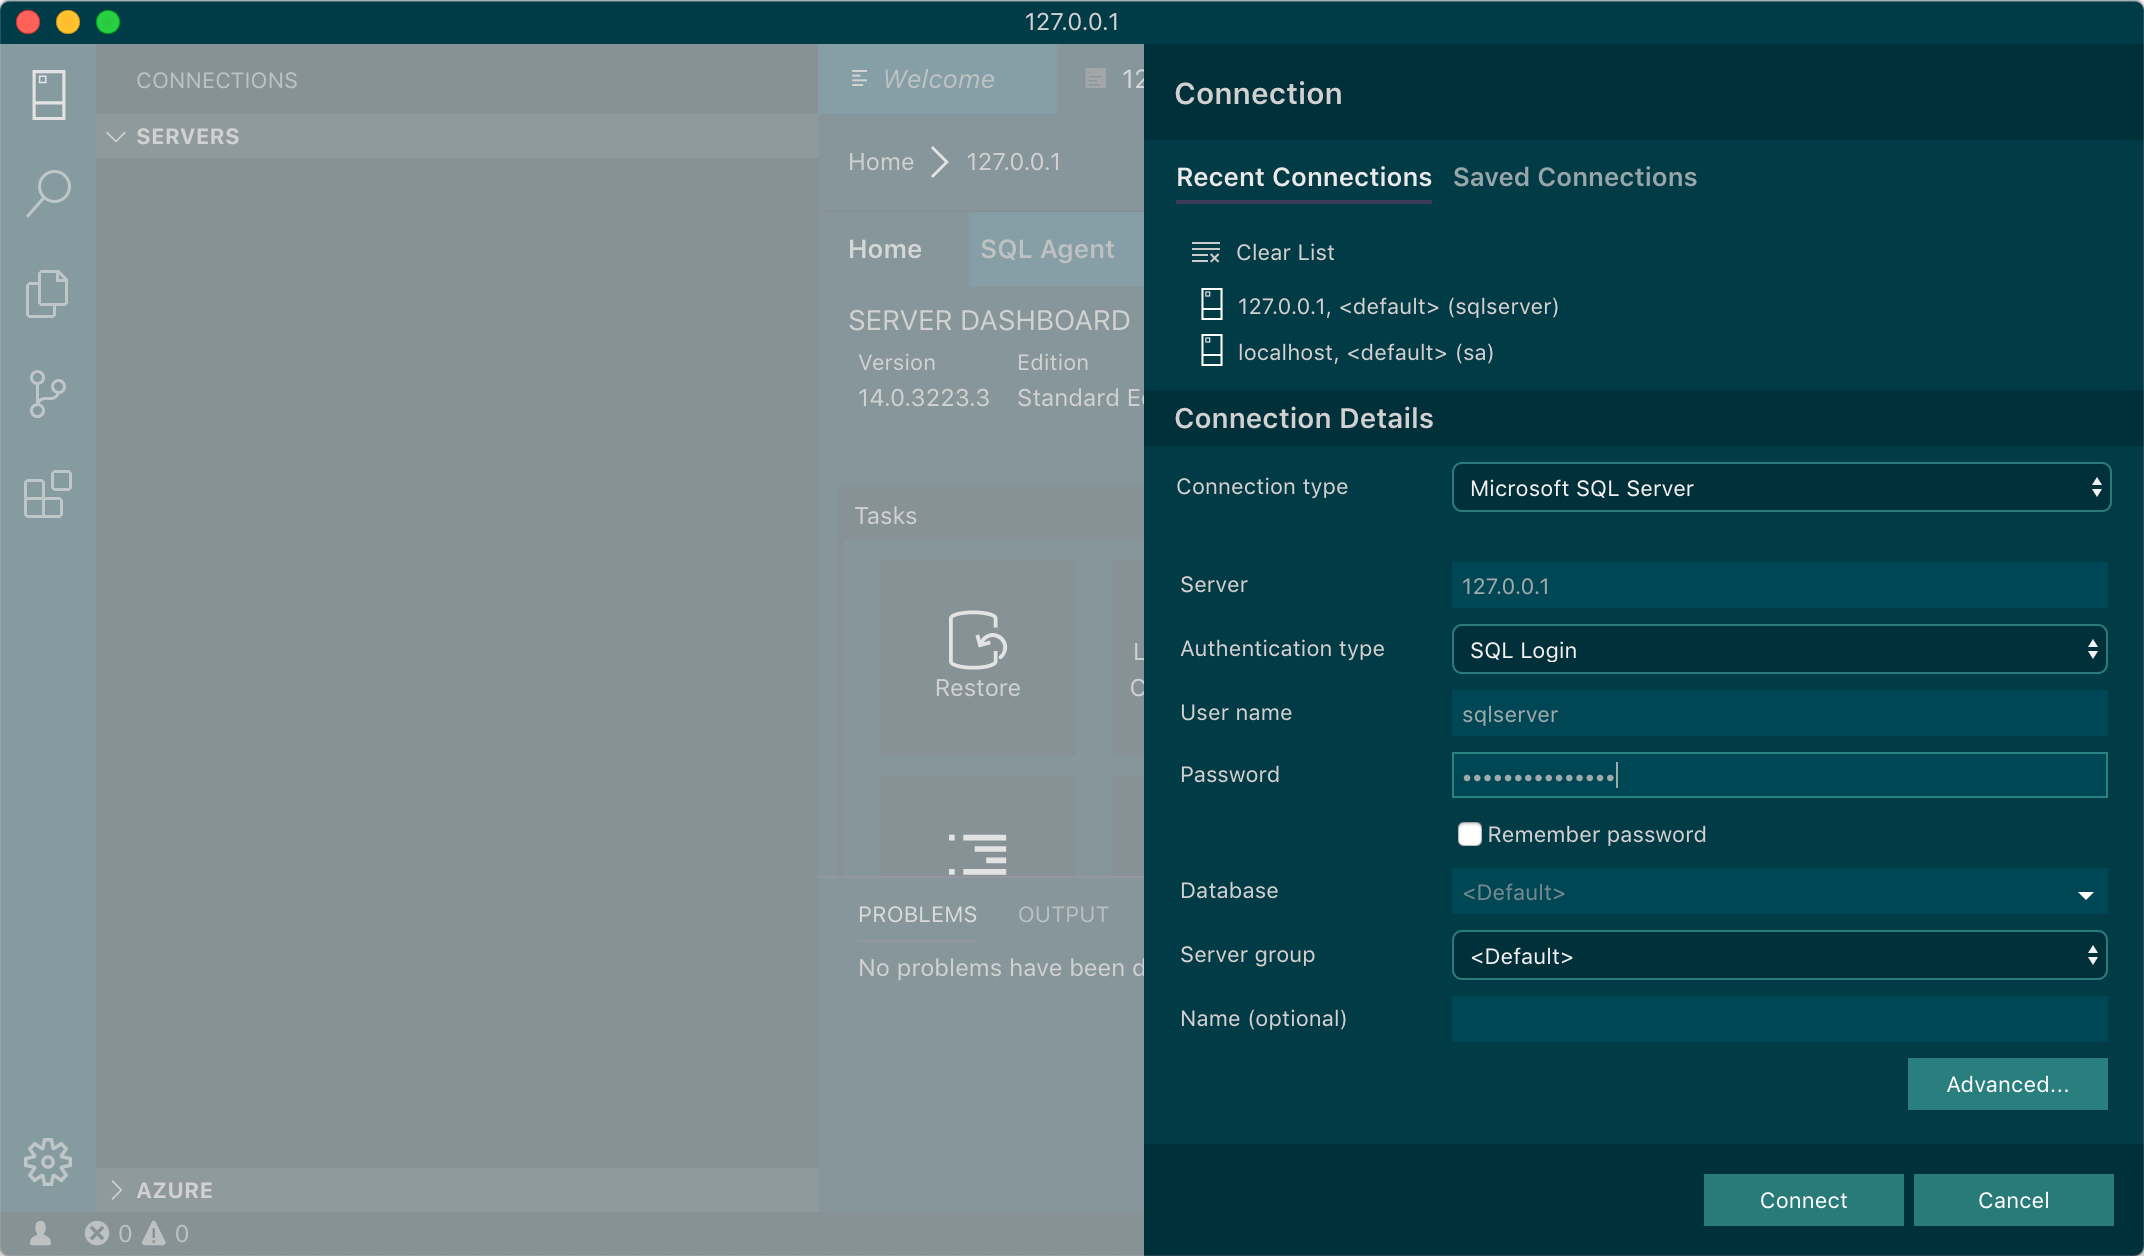
The output is similar to the following:
Done! You have now setup your first Cloud SQL for SQL Server instance.
Expect future post that will outline how to use the gcloud command line to create and configure an instance, configure for Backups and High Availability, connectivity with Private IP and restoring backups.
Enjoy!